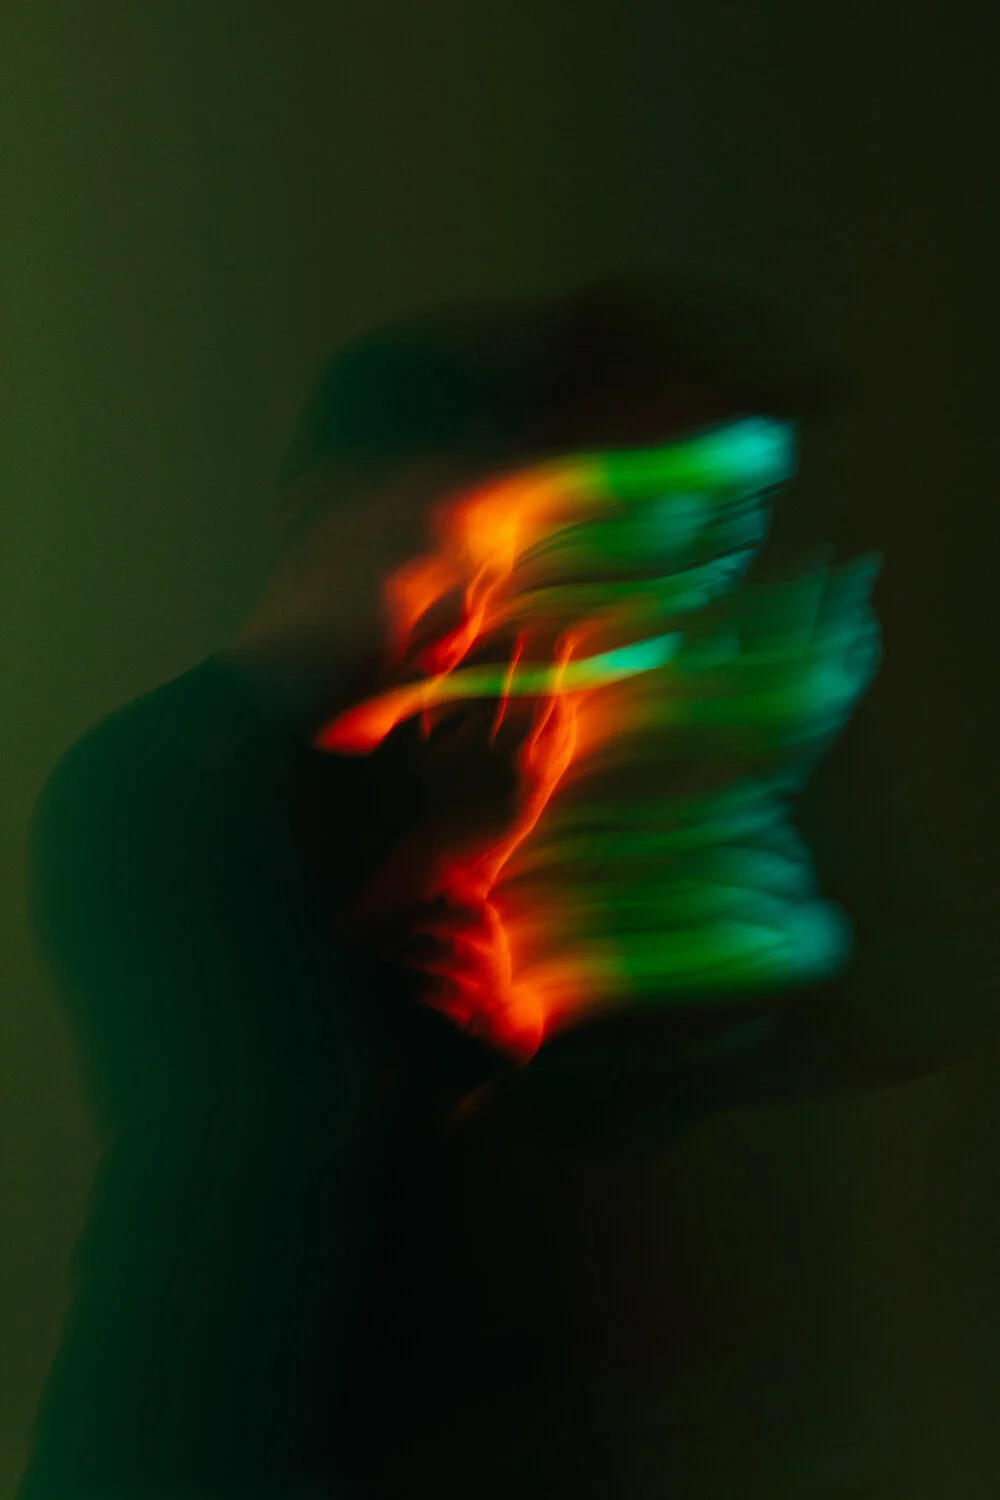
Tryzdin Grubbs (American Idol contestant) Photo Shoot
Tryzdin Grubbs is an uber-talented, 15-year old singer from Columbus. He also just happened to get accepted onto the latest season of American Idol. Before the episode had even aired, Tryzdin popped by my studio for a photo shoot. This was our third shoot in as many years and this one was the most dynamic yet. We’ve both grown quite a bit in our respective crafts and so it was cool to see what new things we were bringing to the shoot, from a personal and professional standpoint. Here are just a few of the different looks that we knocked out in the brief but efficient, one-hour shoot.
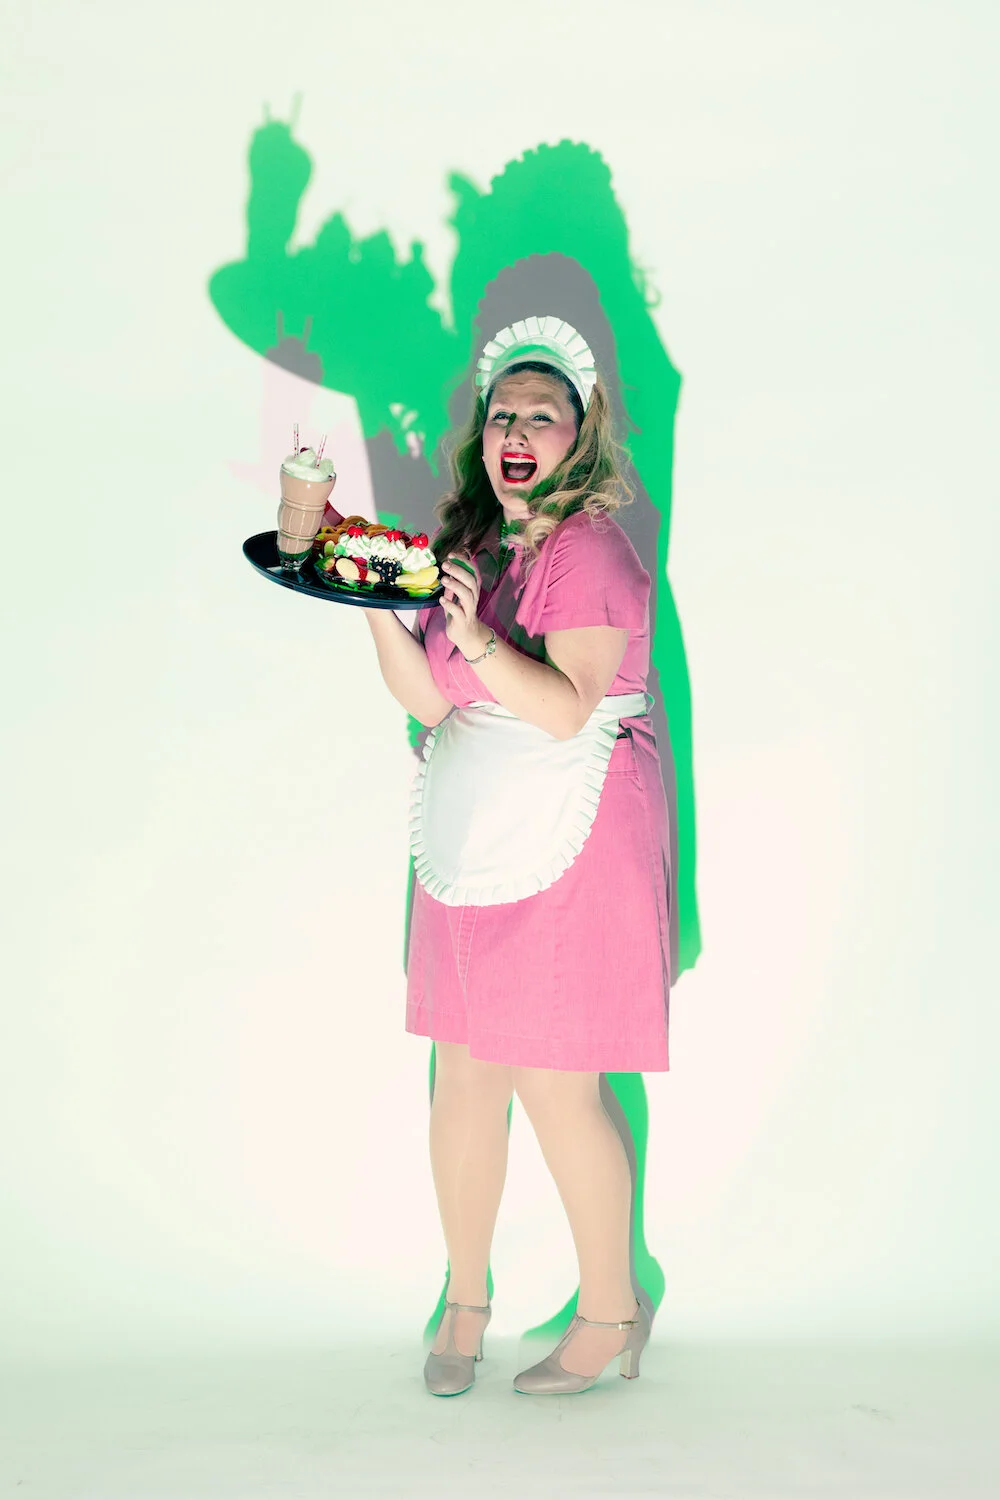
34 West Theater Co. 2021 Season
This was my 11th season working with 34 West Theater, who are based in downtown Charleston, South Carolina. Over the years we’ve grown be be good friends and I always look forward to seeing what we create together. What I love about them is their willingness to improvise. Though I suppose that’s an element that most actors celebrate, it’s not always the case that I’m given such a broad range of creative freedom in a shoot. They always come to the shoot with a broad range of outfits, props, and some general ideas for where they’d like the images to go, but they ultimately leave it up to me to transform their ideas into images that they’ll use for promoting their upcoming shows…
This was my 11th season working with 34 West Theater, who are based in downtown Charleston, South Carolina. Over the years we’ve grown be be good friends and I always look forward to seeing what we create together. What I love about them is their willingness to improvise. Though I suppose that’s an element that most actors celebrate, it’s not always the case that I’m given such a broad range of creative freedom in a shoot. They always come to the shoot with a broad range of outfits, props, and some general ideas for where they’d like the images to go, but they ultimately leave it up to me to transform their ideas into images that they’ll use for promoting their upcoming shows.
For the first set I decided to light them with a hard light creating bold, crisp shadows, which I filled in with a cyan light to create bright, colorful images. As Stephen began posing with a mirrorball I decided to channel the iconic Annie Leibovitz / Demi Moore pregnancy shoot for Vanity Fair. The results were as ridiculous as they were fun.
After that we went even more vintage, going for Hitchcock and Aretha Franklin vibes. I used half a yellow gel on my key light to shift the aqua-colored backdrop to a more vintage teal color. To get the darker shot I added a snoot to the key light and added a soft fill light to keep the rest of the image from going completely black.
Next up were the 80’s, so I went bold with the colors, shooting on an orange sweep with magenta and blue accent lights.
This next set ended up being my favorite of the day. They told me that the idea behind this next play was a 1950’s diner that was invaded by zombies. I immediately thought of the aesthetic behind Mars Attacks!. Not necessarily the movie but all the art. It’s dramatic, over the top, and as funny as it is scary. I decided to light the actors from below (monster lighting) with two hard lights (one green, one neutral) to create crisp shadows with green accents. Then they did a series of poses where they use commonplace items as weapons.
Finally, they wanted to take a group shot of the whole company. In their theater is an iconic red sofa that’s been there for years. We’ve used it in previous shoots before and decided to use it again. I happened to look out of the window and see gorgeous light and shadow on the wall of the building across the street and asked if they’d be open to moving the sofa to the sidewalk for the shot, in the vein of The Cranberries. After shooting a number of arrangements on the sidewalk I asked if they’d be willing to take the couch to a spot below the famous Charleston bridge. One of the actors knew of the perfect spot. It was a perfect end to a perfect collaboration.
Michael Malul London Fragrance Campaign Photo Shoot
A few weeks ago I shot product and advertising photos for Michael Malul London fragrances. Not only did I shoot and edit the photos but this was my first time solo-styling a shoot. I shopped for fruits, herbs, and plants, as well as collected a range of organic materials and textured surfaces to help convey the unique notes in each fragrance. The experience of styling felt like equal parts scavenger hunt and art making. I’ve found that creating a compelling still life is exponentially harder than making a portrait since there is no collaborative dynamic with a living subject. Everything that happens in the frame is my doing. It took me back to my days in art school, learning how to create visual movement and balance in a composition. So hard but so fun.
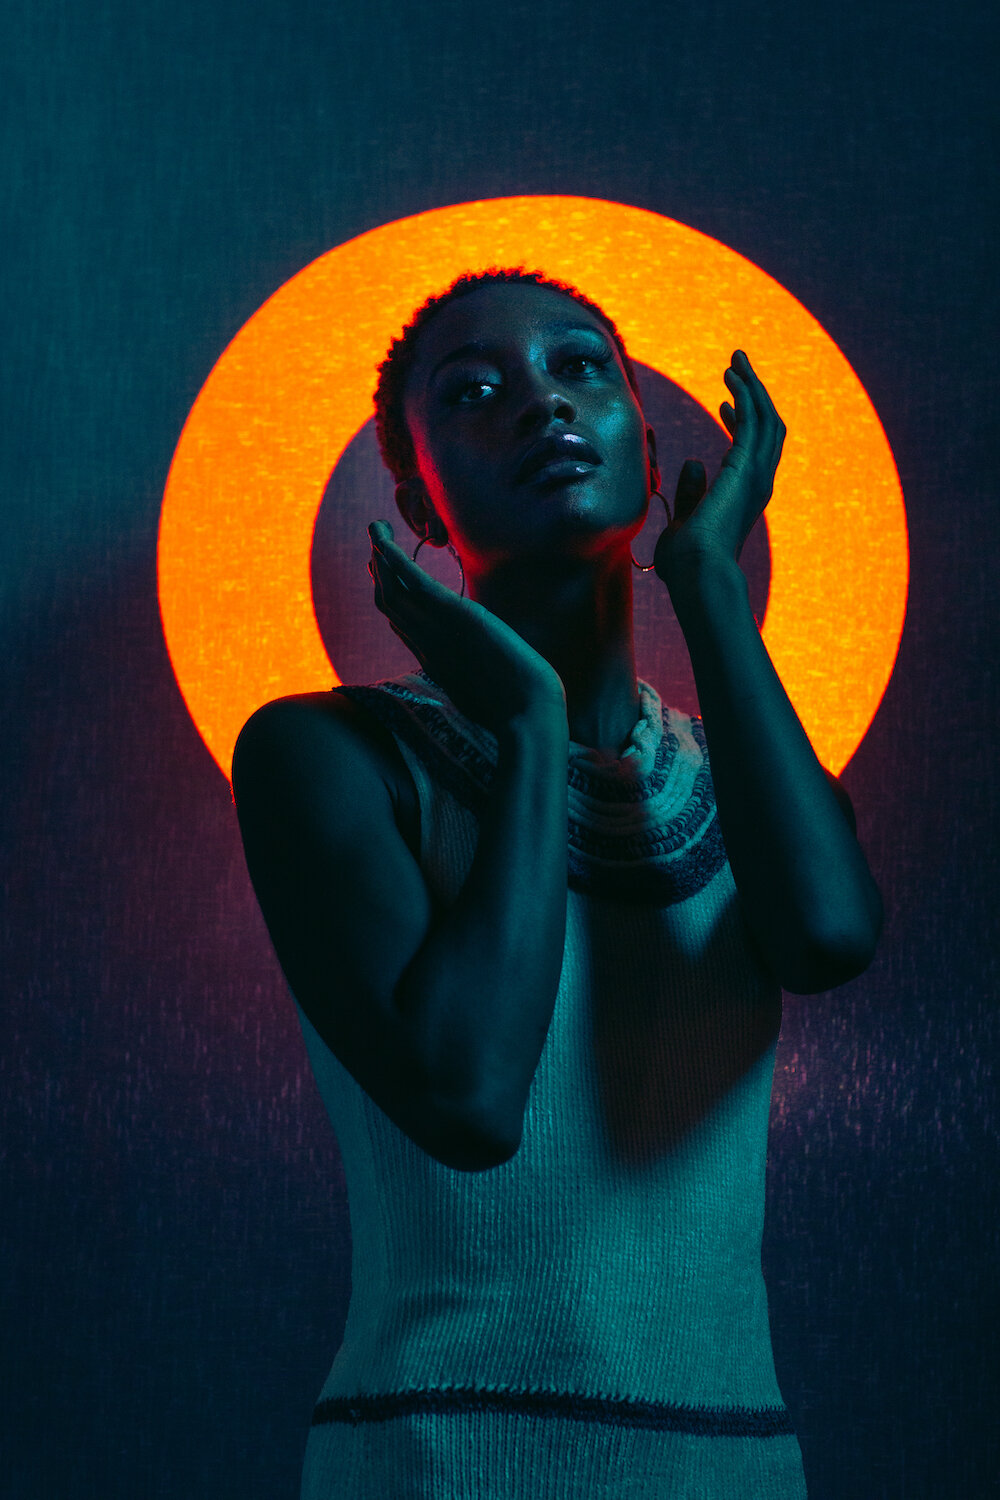
Collaboration with Clothing Designer Xuena Pu
This was a deceptively simple shoot. Designer Xuena Pu makes garments with bold shapes, so I decided to make a range of basic shapes in Photoshop which I projected onto fabric behind the model. I made the shapes orange and chose to light the model with a complementary color of cyan. I used a softbox to create even, flattering light, making to add a grid to in order to avoid overlighting the backdrop. I then posed Dajia so that her lines (or lines from the garment) either aligned or broke out of the projected shapes.
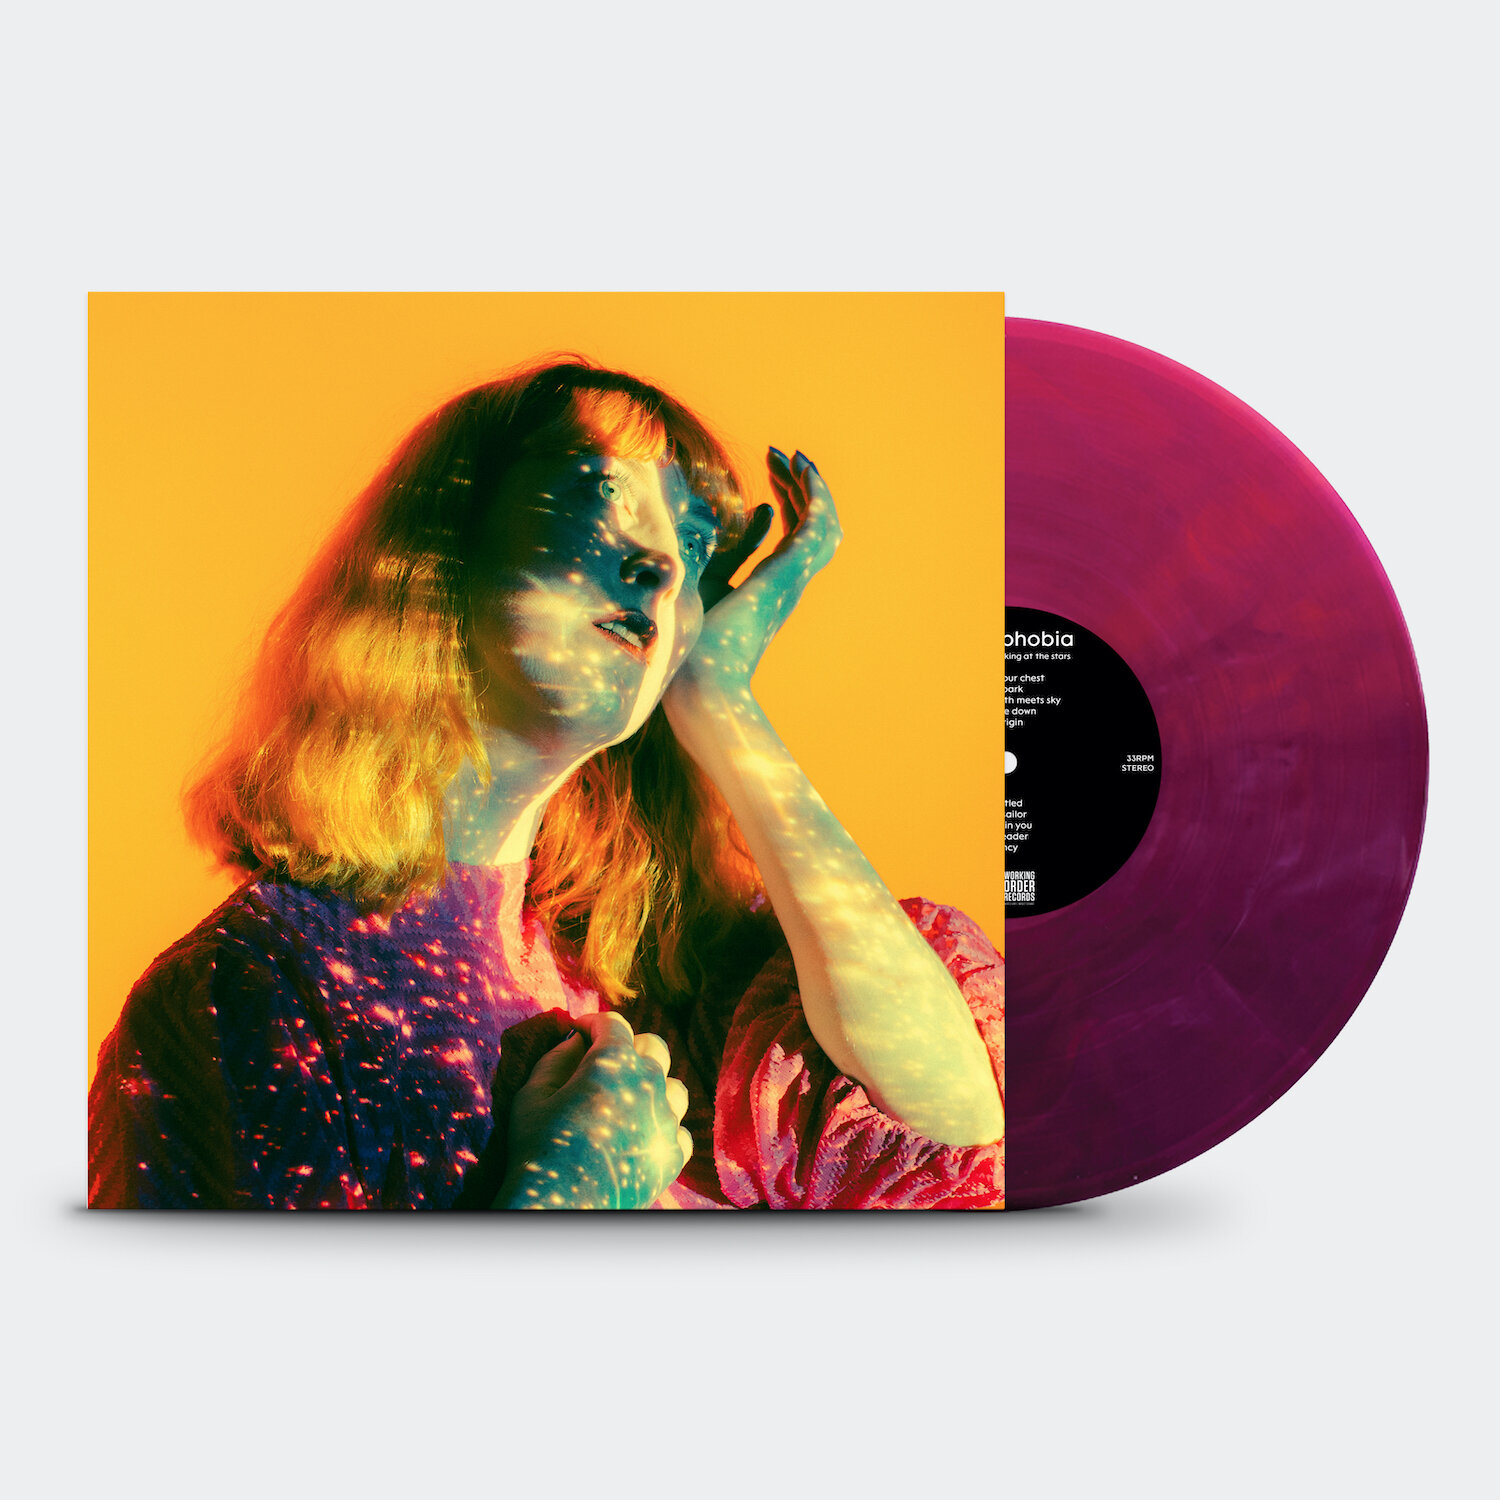
Technophobia: Some of Us Are Looking at the Stars Photo Shoot
I listened to more than my share of darkwave and industrial synth back in the day so I was more than a little stoked when the DC-based duo Technophobia reached out to me to shoot press photos for their upcoming album cycle. They left much of the creative direction up to me, inviting me to “do what I do”, which I interpreted as “whatever I’ve been experimenting with lately”…
I listened to more than my share of darkwave and industrial synth back in the day so I was more than a little stoked when the DC-based duo Technophobia reached out to me to shoot press photos for their upcoming album cycle. They left much of the creative direction up to me, inviting me to “do what I do”, which I interpreted as “whatever I’ve been experimenting with lately”. Since I’d been exploring long exposures with multi-colored LEDs and a moving subject, that’s what we started with. They told me their album title was “Some of Us Are Looking at the Stars” (a quote from Oscar Wilde), so I decided to project images of stars onto the singer, Katie Petix. For the final setup we shot in an abandoned room in the building where my studio resides, making ghostly, window-lit long exposures in the vein of Francesca Woodman.
You can pre-order their upcoming album, here. Here’s a message from the band:
100% of the proceeds raised though the PRE-ORDER of our new album "Some of Us Are Looking at the Stars" and ALL Working Order Records merch, from 10/2/2020 through 12/06/2020, will be donated to Community of Hope to support their annual gift card “Holiday Cheer Campaign” benefiting families in their housing programs. Community of Hope’s mission is to improve health and end family homelessness to make Washington, DC more equitable. In 2019, Community of Hope reached 1,227 families overcoming or threatened by homelessness and 13,835 patients. They are making a HUGE impact in our community!
Make or Die
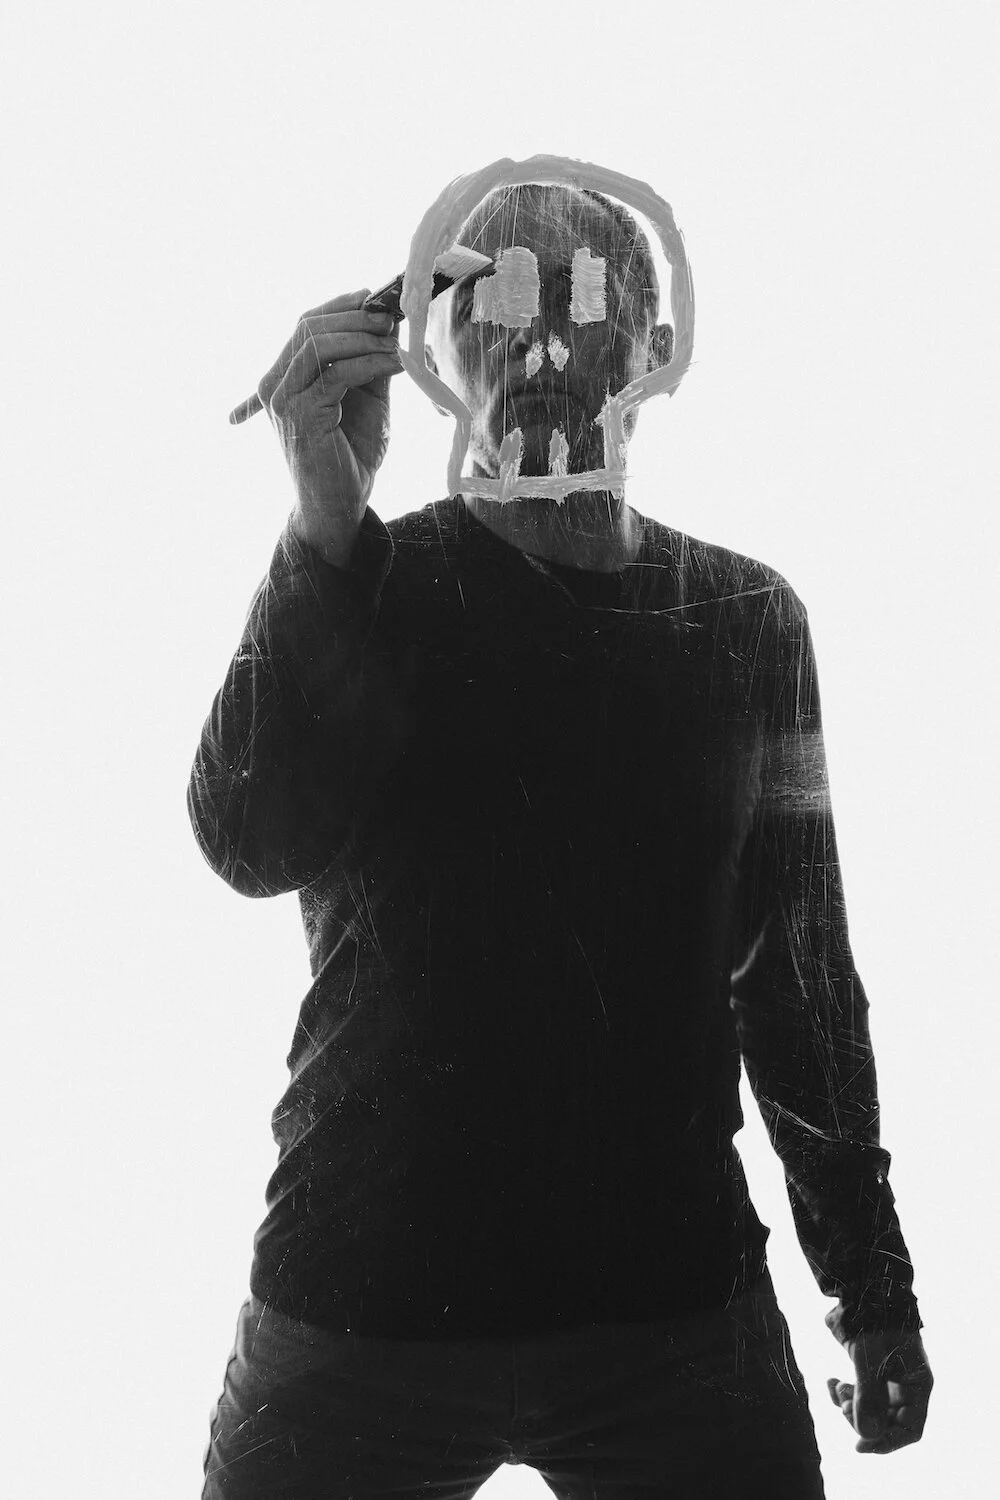
I recently collaborated with illustrator/designer/friend Dylan Menges. I wanted to explore shooting a subject through plexiglass while they painted and he was the first person that came to mind. Collaboration with another artist really takes a lot of the pressure of me as the photographer. I can give him some basic direction and then just capture the beauty that unfolds before me. An element that I really love but didn’t plan for are all the scuff marks on the plexiglass. It adds such a gorgeous tactility to the images…

I recently collaborated with illustrator/designer/friend Dylan Menges. I wanted to explore shooting a subject through plexiglass while they painted and he was the first person that came to mind. Collaboration with another artist really takes a lot of the pressure of me as the photographer. I can give him some basic direction and then just capture the beauty that unfolds before me. An element that I really love but didn’t plan for are all the scuff marks on the plexiglass. It adds such a gorgeous tactility to the images.
After the first set I did a quick little light study with a projector, strobes, and shutter drag because why not.
Tim Hortons US Fall Social Campaign
Last month I worked with the fine folks at 5 Hundred Degrees to shoot the Tim Hortons US fall social campaign. It was a beautiful day spent outdoors sculpting light and arranging pumpkins. Thanks always to Seth Miller, my assistant.
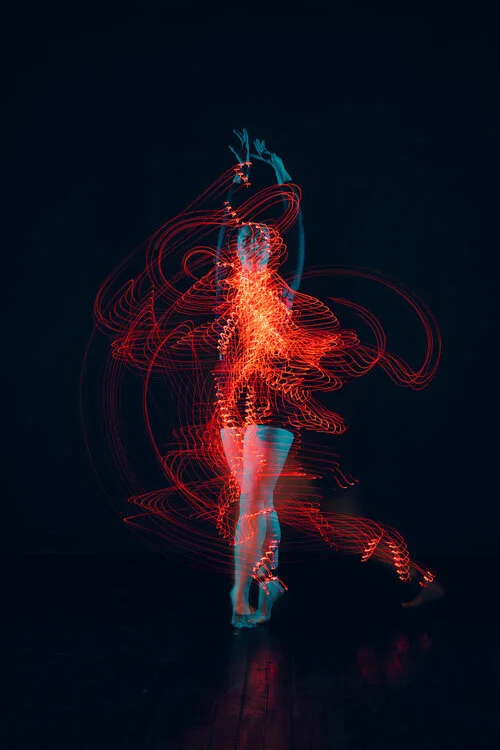
Long Exposures with Dancers Wrapped in LEDs
In my last post I mentioned how I’ve struggled for years to capture the essence of a dancer in a single frame. These are more attempts in this ongoing quest…
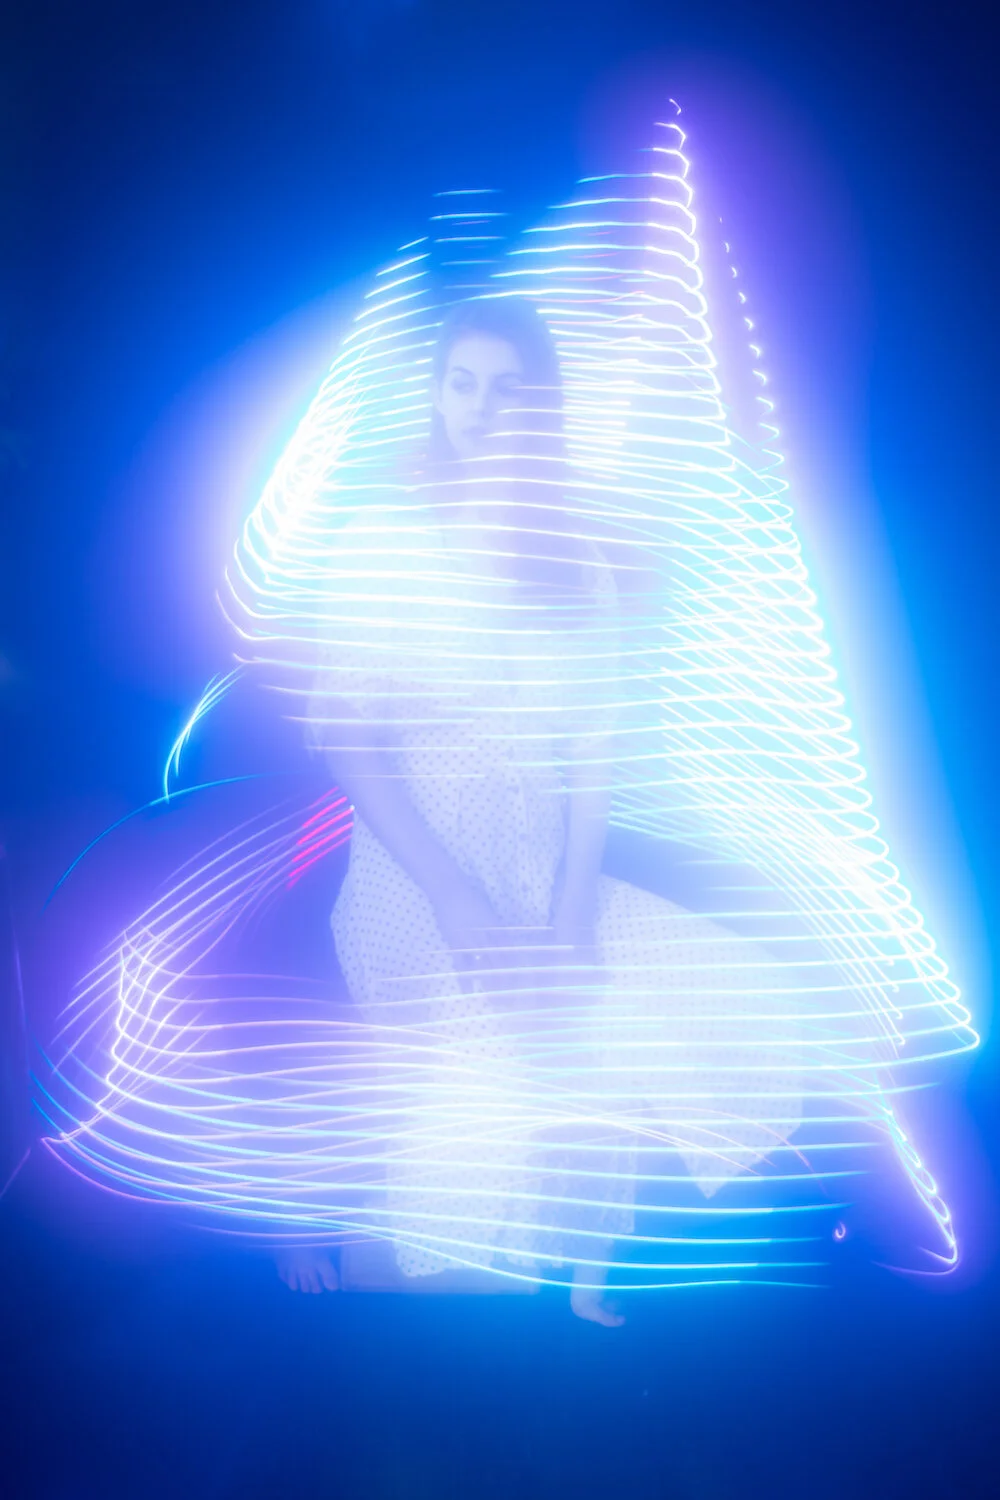
In my last post I mentioned how I’ve struggled for years to capture the essence of a dancer in a single frame. These are more attempts in this ongoing quest.
I started by wrapping dancers in LED lights. I had four different strips of LEDs, placing each strip on a different section of their body: leg, trunk, arm, and head. For the initial sequence I had the four strips all set to pulse through the whole color spectrum. Depending on how long the exposure was and how dynamic the dancers movement was determined what kinds of colors and shapes were created. I found that if the exposures were 5 seconds or longer the lights filled in to a bluish-white light, which was less interesting, so I directed them to move high to low and side to side as I snapped off 2 and 3-second exposures. I also tried out using my fungus-filled lens on a few of the frames, resulting in the hazy glow that you can see.
In the next sequence I set the LED strips to solid colors. Sometimes I turned them all to the same color, such as red. Other times I had each strip on a different solid color. I found the latter to be the most dynamic so far as it allows you to better see which parts of the dancer’s body made which shape.
After that I set all the LEDs to the same color and then added two gelled-strobes, placed on either side of the dancer in order to illuminate them separate from the lines of movement. The trick was then to pop the flash at the precise moment that the dancers were in a flattering pose, such as with an arm or leg fully extended. After shooting this way for a bit I found it the most helpful to take the flash trigger off of my camera and hold it in my hand. That way I could start the exposure whenever I wanted and wait for the perfect pose to manually pop the flashes.
For the final iteration of these experiments I implemented a smoke machine to see how the smoke would capture the moving lights. I started with the strobes placed to the sides as I did before but ultimately decided to place them behind her, aiming back toward the camera to act as dual suns, shining through the haze.
The more I play with long exposures and LEDs the more possibilities come to mind, which I’m really excited to explore.
Fungus in Lens Creates Ethereal Glow in Images
The above image is a raw file— straight out of camera with no editing. It was created by shooting with a kit lens— which are very inexpensive and poor quality to begin with— that was made worthless by most anyone’s standard once it grew a fungus inside. I found this flawed treasure on eBay and have been exploring its possibilities over the last year, with this latest shoot being the most successful by far...
The above image is a raw file— straight out of camera with no editing. It was created by shooting with a kit lens— which are very inexpensive and poor quality to begin with— that was made worthless by most anyone’s standard once it grew a fungus inside. I found this flawed treasure on eBay and have been exploring its possibilities over the last year, with this latest shoot being the most successful by far.
The haziness in the images is caused by the fungus which created a colorful glow as @sethmosesmiller twirled a strand of LED lights around @bameliaann during a 5-second exposure. Each shot was different as the colors of the lights changed and struck the sensor in a unique combination. I’m excited to keep exploring the possibilities.
My Photography Studio: From Basement to Loft
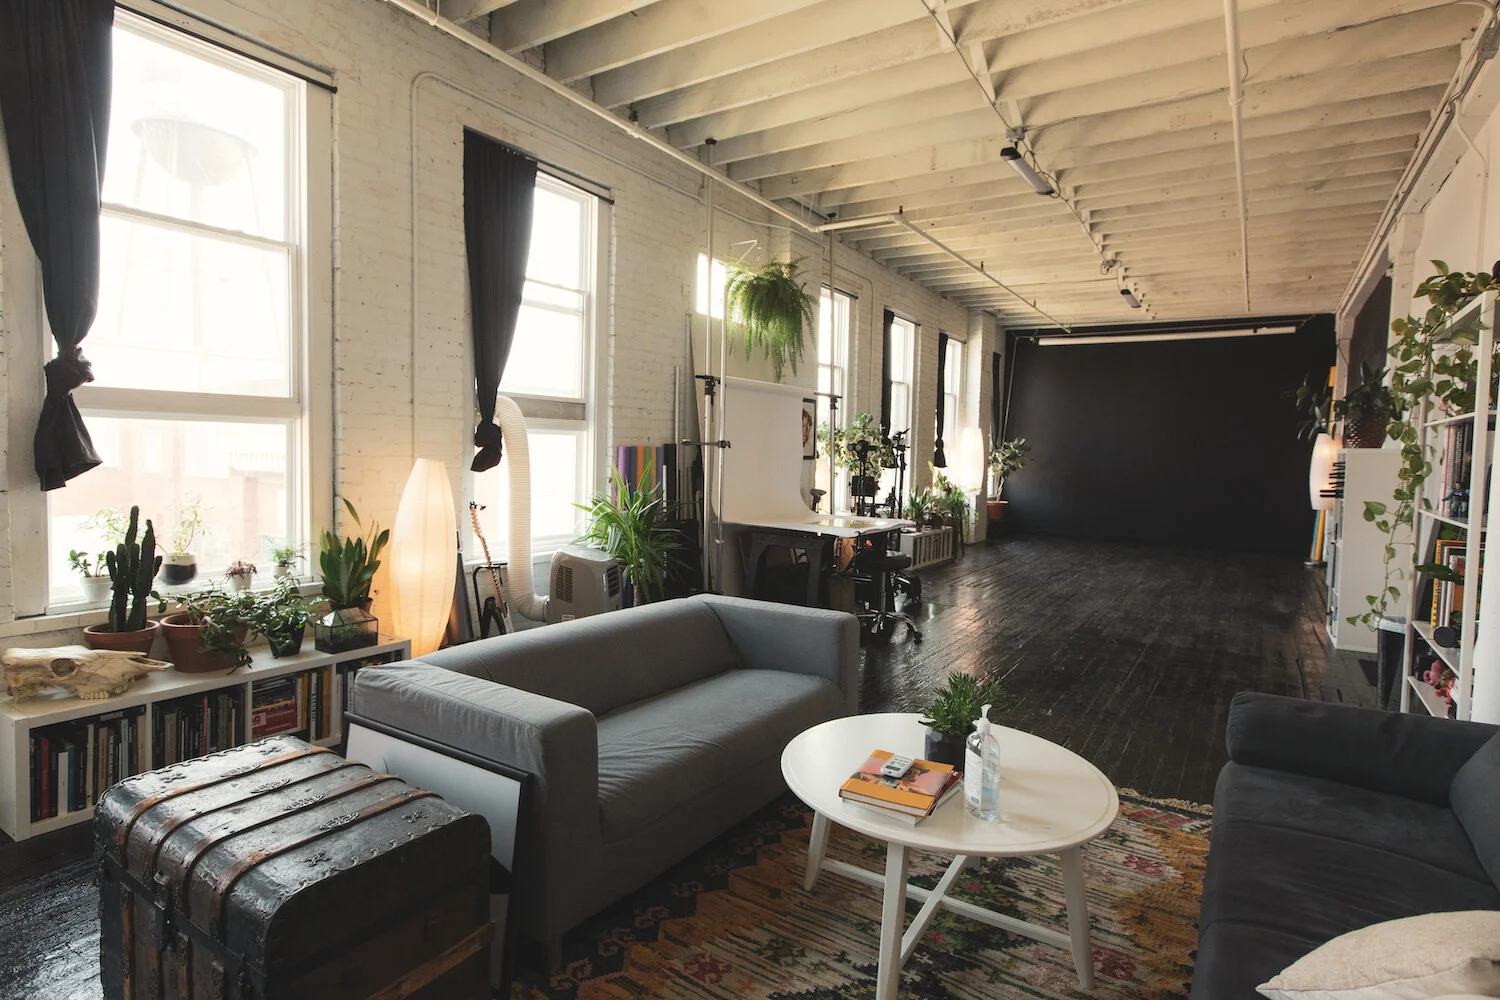
This is my studio. Not even 5 years ago my studio was in my basement. The ceiling was just under 7ft and the foundation leaked every time it rained. My lighting kit was little more than a couple battery-powered flashes and a desk lamp. Though I only had a tiny space and limited gear, it was my space. I learned to use every inch of that studio and gear…
This is my studio. Not even 5 years ago my studio was in my basement. The ceiling was just under 7ft and the foundation leaked every time it rained. My lighting kit was little more than a couple battery-powered flashes and a desk lamp. Though I only had a tiny space and limited gear, it was my space. I learned to use every inch of that studio and gear.
If I could have allowed myself to dream about where my future self would be when I graduated art school 15 years ago, this wouldn’t have been it. But the limitations that accompanied working with minimal resources really pushed innovation in my craft.
The things I learned while in that basement studio went on to inspire several books, many techniques, and ultimately led me to where I sit today. My gear has changed a little but not too much. The same scrappy, run and gun ethos is behind every piece of equipment and furniture in here. They each serve a very specific purpose and I’m grateful for all of it.
Discovery with Marissa Nadler
A couple weeks ago I drove down to Nashville to photograph @marissa_nadler. I’d been a fan of her music for almost 15 years so I was super excited to work with her. I didn’t have any visual plans for the shoot— no mood board or pre-conceived ideas. In recent years I’ve really embraced improvisation when it comes to shoots. I bring a few key pieces of equipment with me— enough to cover a broad range of techniques— and then I allow the space, the subject, and the moment to dictate what happens within the session. Sometimes it backfires and I come away with nothing. Other times magic happens. Either way, it’s my favorite element of a shoot…
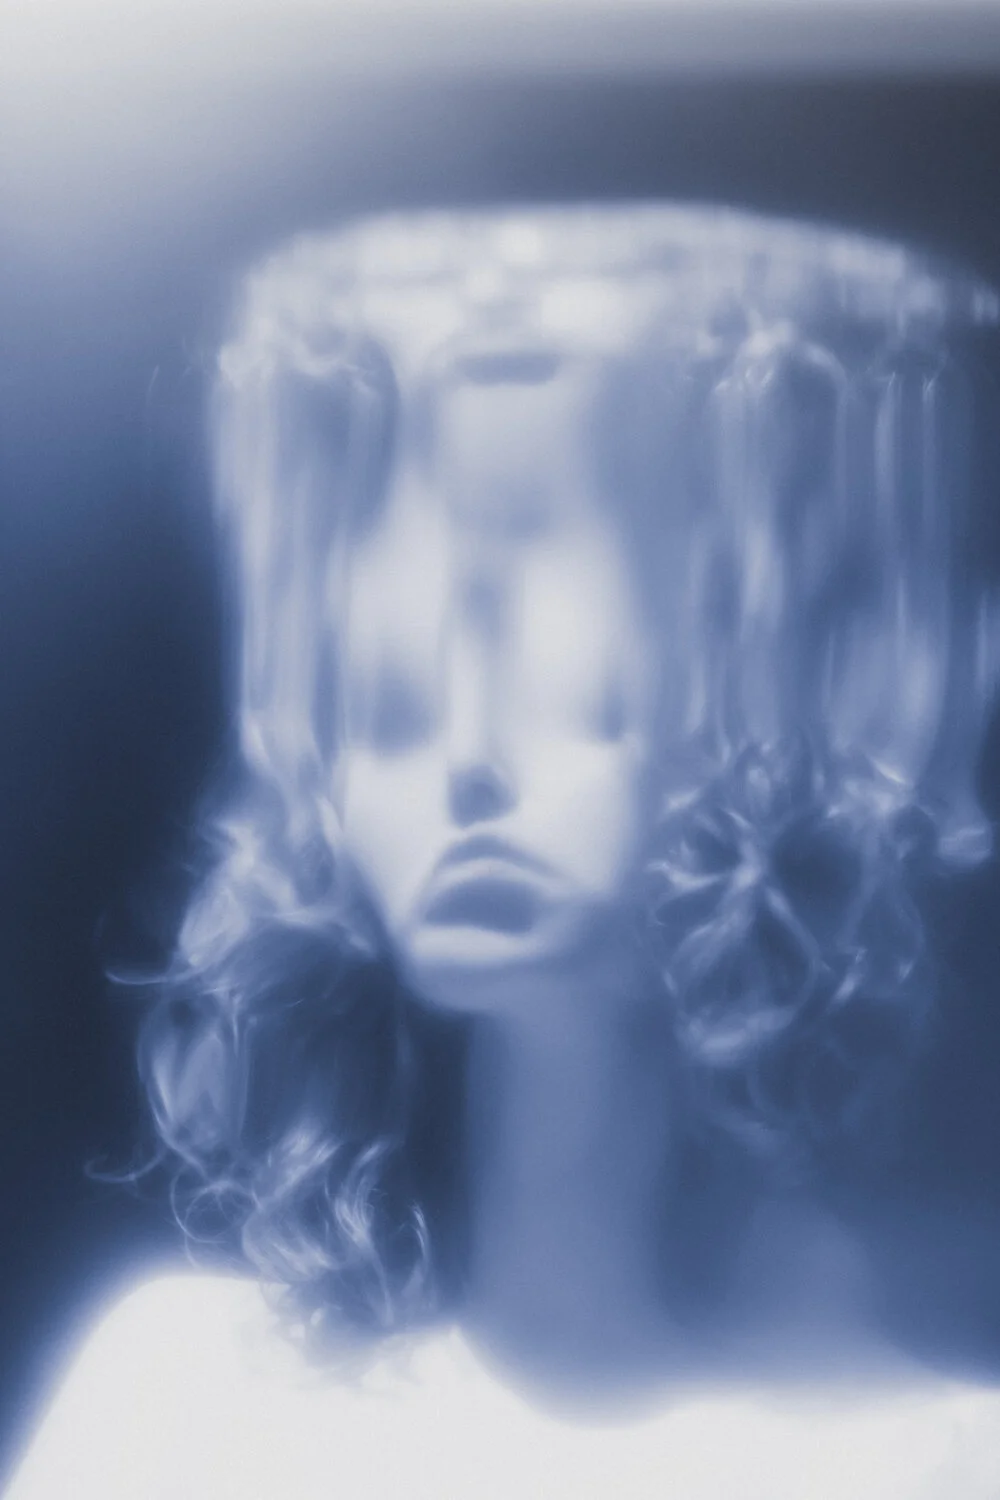
A couple weeks ago I drove down to Nashville to photograph @marissa_nadler. I’d been a fan of her music for almost 15 years so I was super excited to work with her. I didn’t have any visual plans for the shoot— no mood board or pre-conceived ideas. In recent years I’ve really embraced improvisation when it comes to shoots. I bring a few key pieces of equipment with me— enough to cover a broad range of techniques— and then I allow the space, the subject, and the moment to dictate what happens within the session. Sometimes it backfires and I come away with nothing. Other times magic happens. Either way, it’s my favorite element of a shoot.
When I arrived at her house I borrowed some plastic wrap and coconut oil from her, applying it to my lens. Then I had her stand in front of her sheer curtain, which backlit her. The oil feathered the edge of her and mixed with the backlight to create an ethereal atmosphere.
For the next setup I opted to use a patch of sunlight coming through a window in her studio as my light source. Since the window wasn’t positioned in an optimal spot I grabbed a couple of her mirrors and positioned them to bounce the light where I wanted it (thanks for teaching me about mirrors, @paoloverzone). I added grabbed some bubble wrap from her to put on the mirror, which diffused the light by 2-3 stops, making the sunlight and room exposure more even, which I then covered with red and orange gels. By setting my cameras white balance to “tungsten” the room light shifted blue.
What’s especially cool is that both of these setups can be done with any level of camera and most phones, since it’s all about shaping existing light.
For the final scenarios I setup a projector and used a range of images of organic elements like fire and lightning to create dramatic images of Marissa.
Exorcise Routine
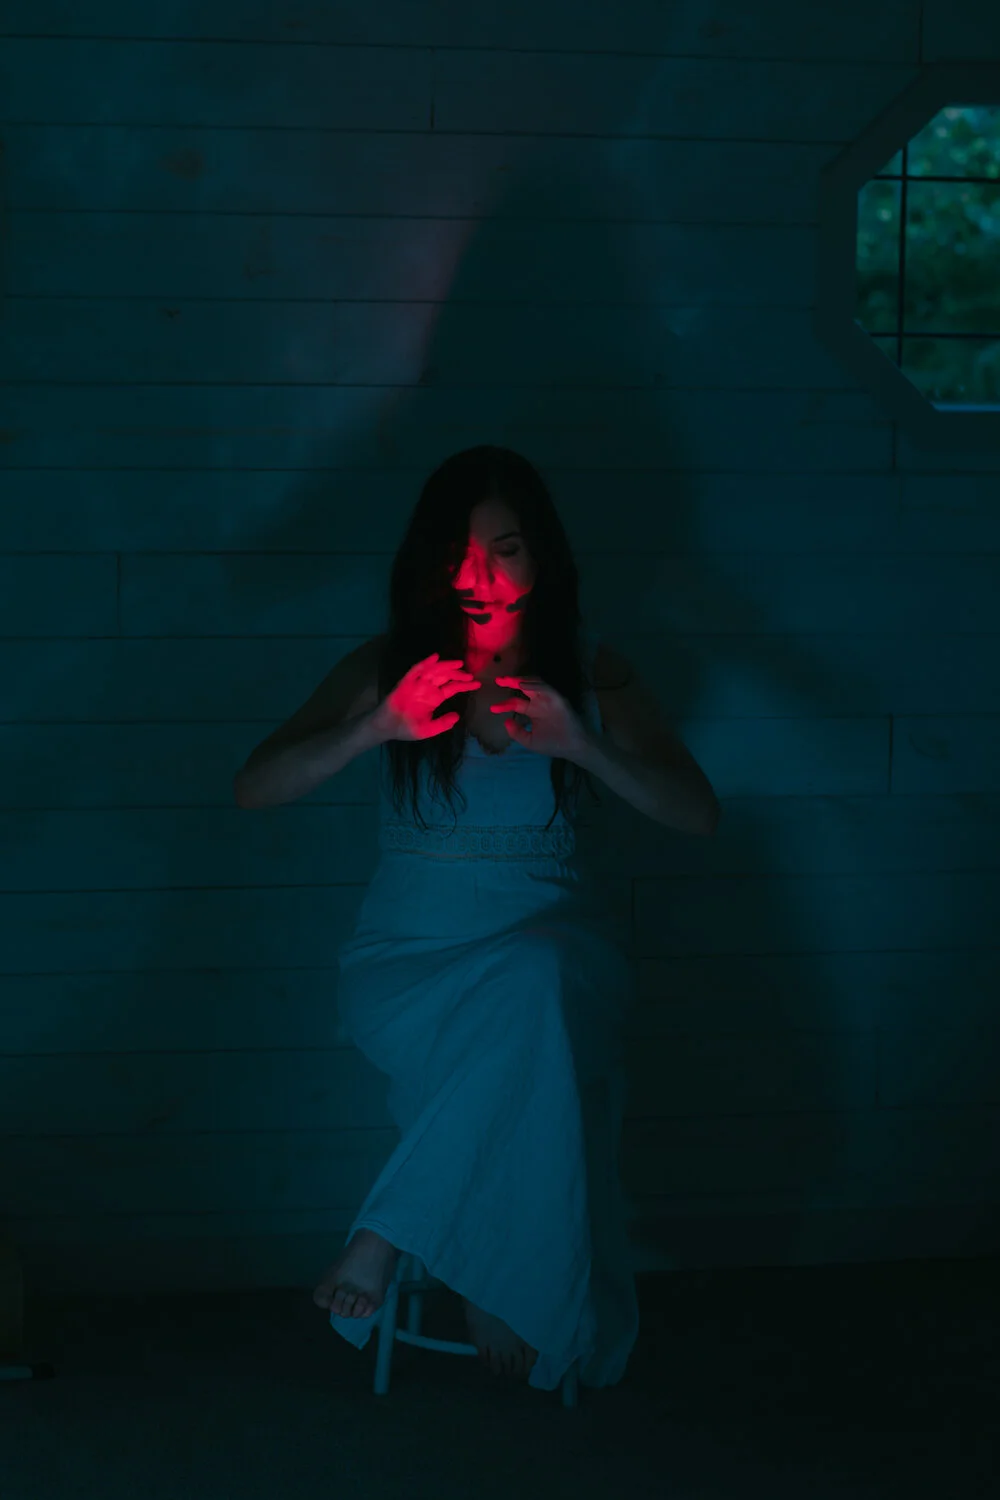
Yesterday I shot with Katy and really leaned into creating dreamlike (nightmarish?) images. I’ve been experimenting with mylar for over a year now and continue to find new ways of interpreting the material. I love the soft reflection it offers, which give the photos a painterly quality. With the warping of the material, otherwise dreamy images turn into those depicting an exorcism.
A Rose by Another Name
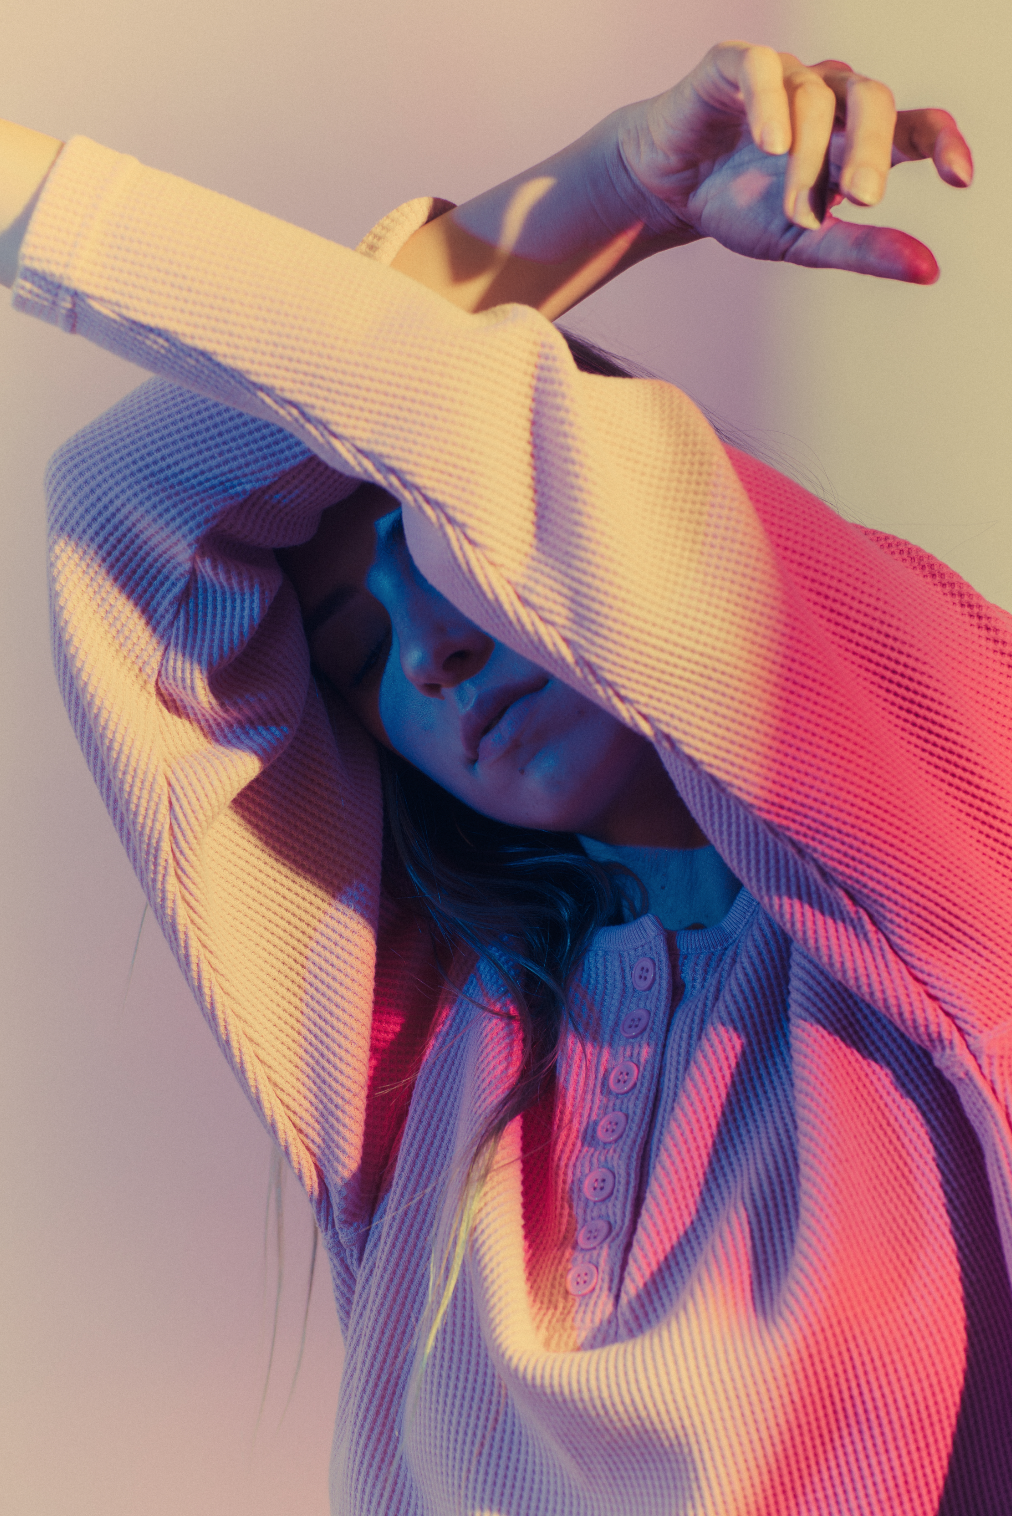
As quarantine restrictions are starting to loosen I am slowly resuming shooting with people IRL, which is such a blessing. This was a quick study of soft pastel colors, which I selected based off Rose’s wardrobe. For the final scenario I (subconsciously?) had Rose cover her face in one of her shirts, which gave the image a mysterious, even mournful look. Though we are beginning to go back to work and return to “normal”, the quarantine has left an obvious mark on human interactions.
Metal Hammer Magazine: Lamb of God
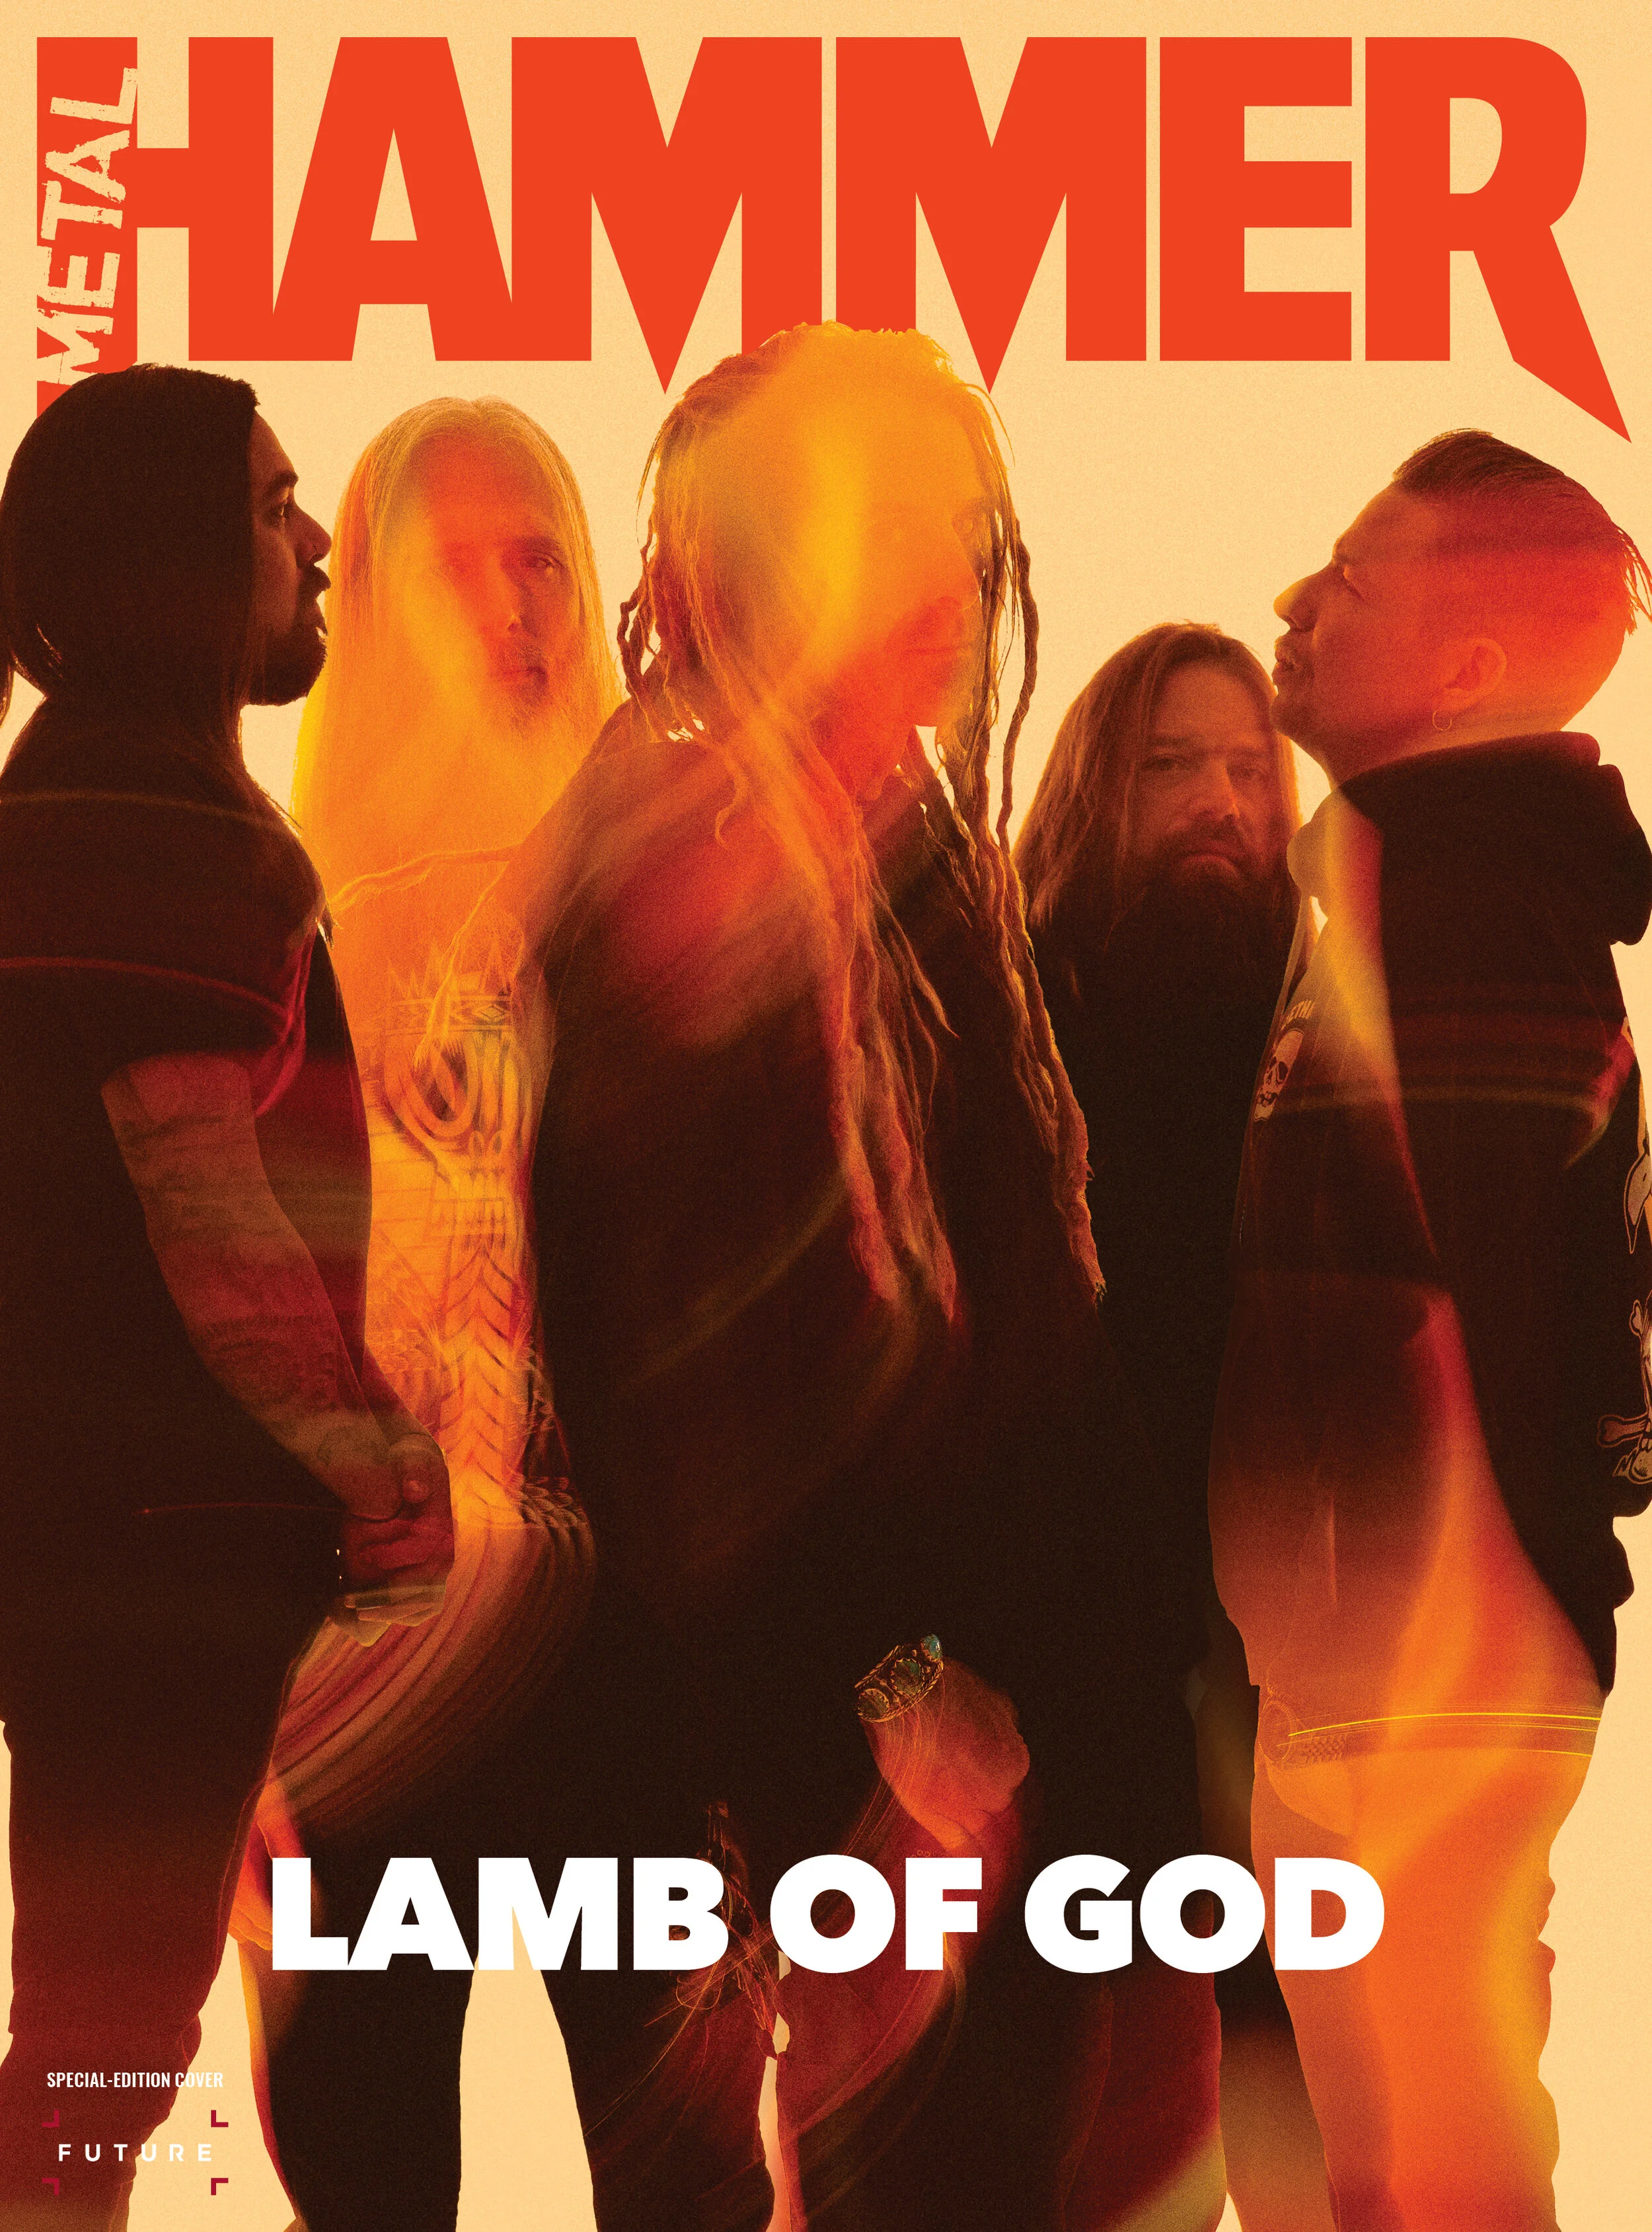
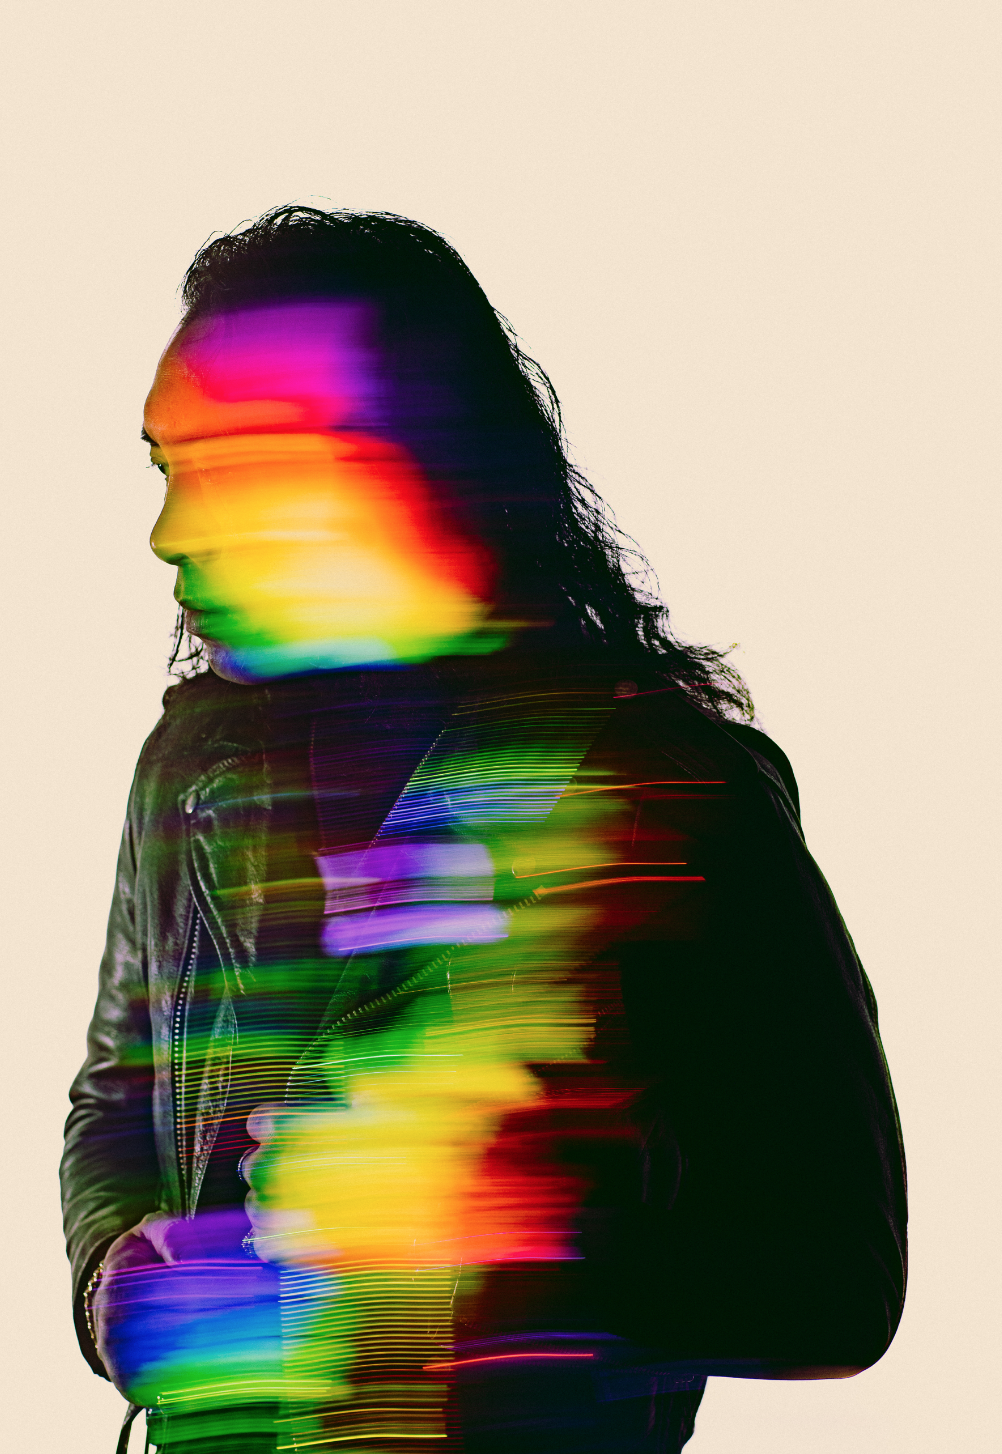
Back in February I had the opportunity to photograph the metal legends Lamb of God in their hometown of Richmond, Virginia. I was told that the theme of the story was revolution so I began to brainstorm ideas for lighting, pose, and technique that would match. We used orange as the color palette, giving a nod to Russian propaganda posters. I also decided to give a nod to the infamous NWA album cover for Straight Outta Compton.
Thank you to editors Louise Brock and Merlin Aldershade for the opportunity.
Episode Two of The Creative Portrait
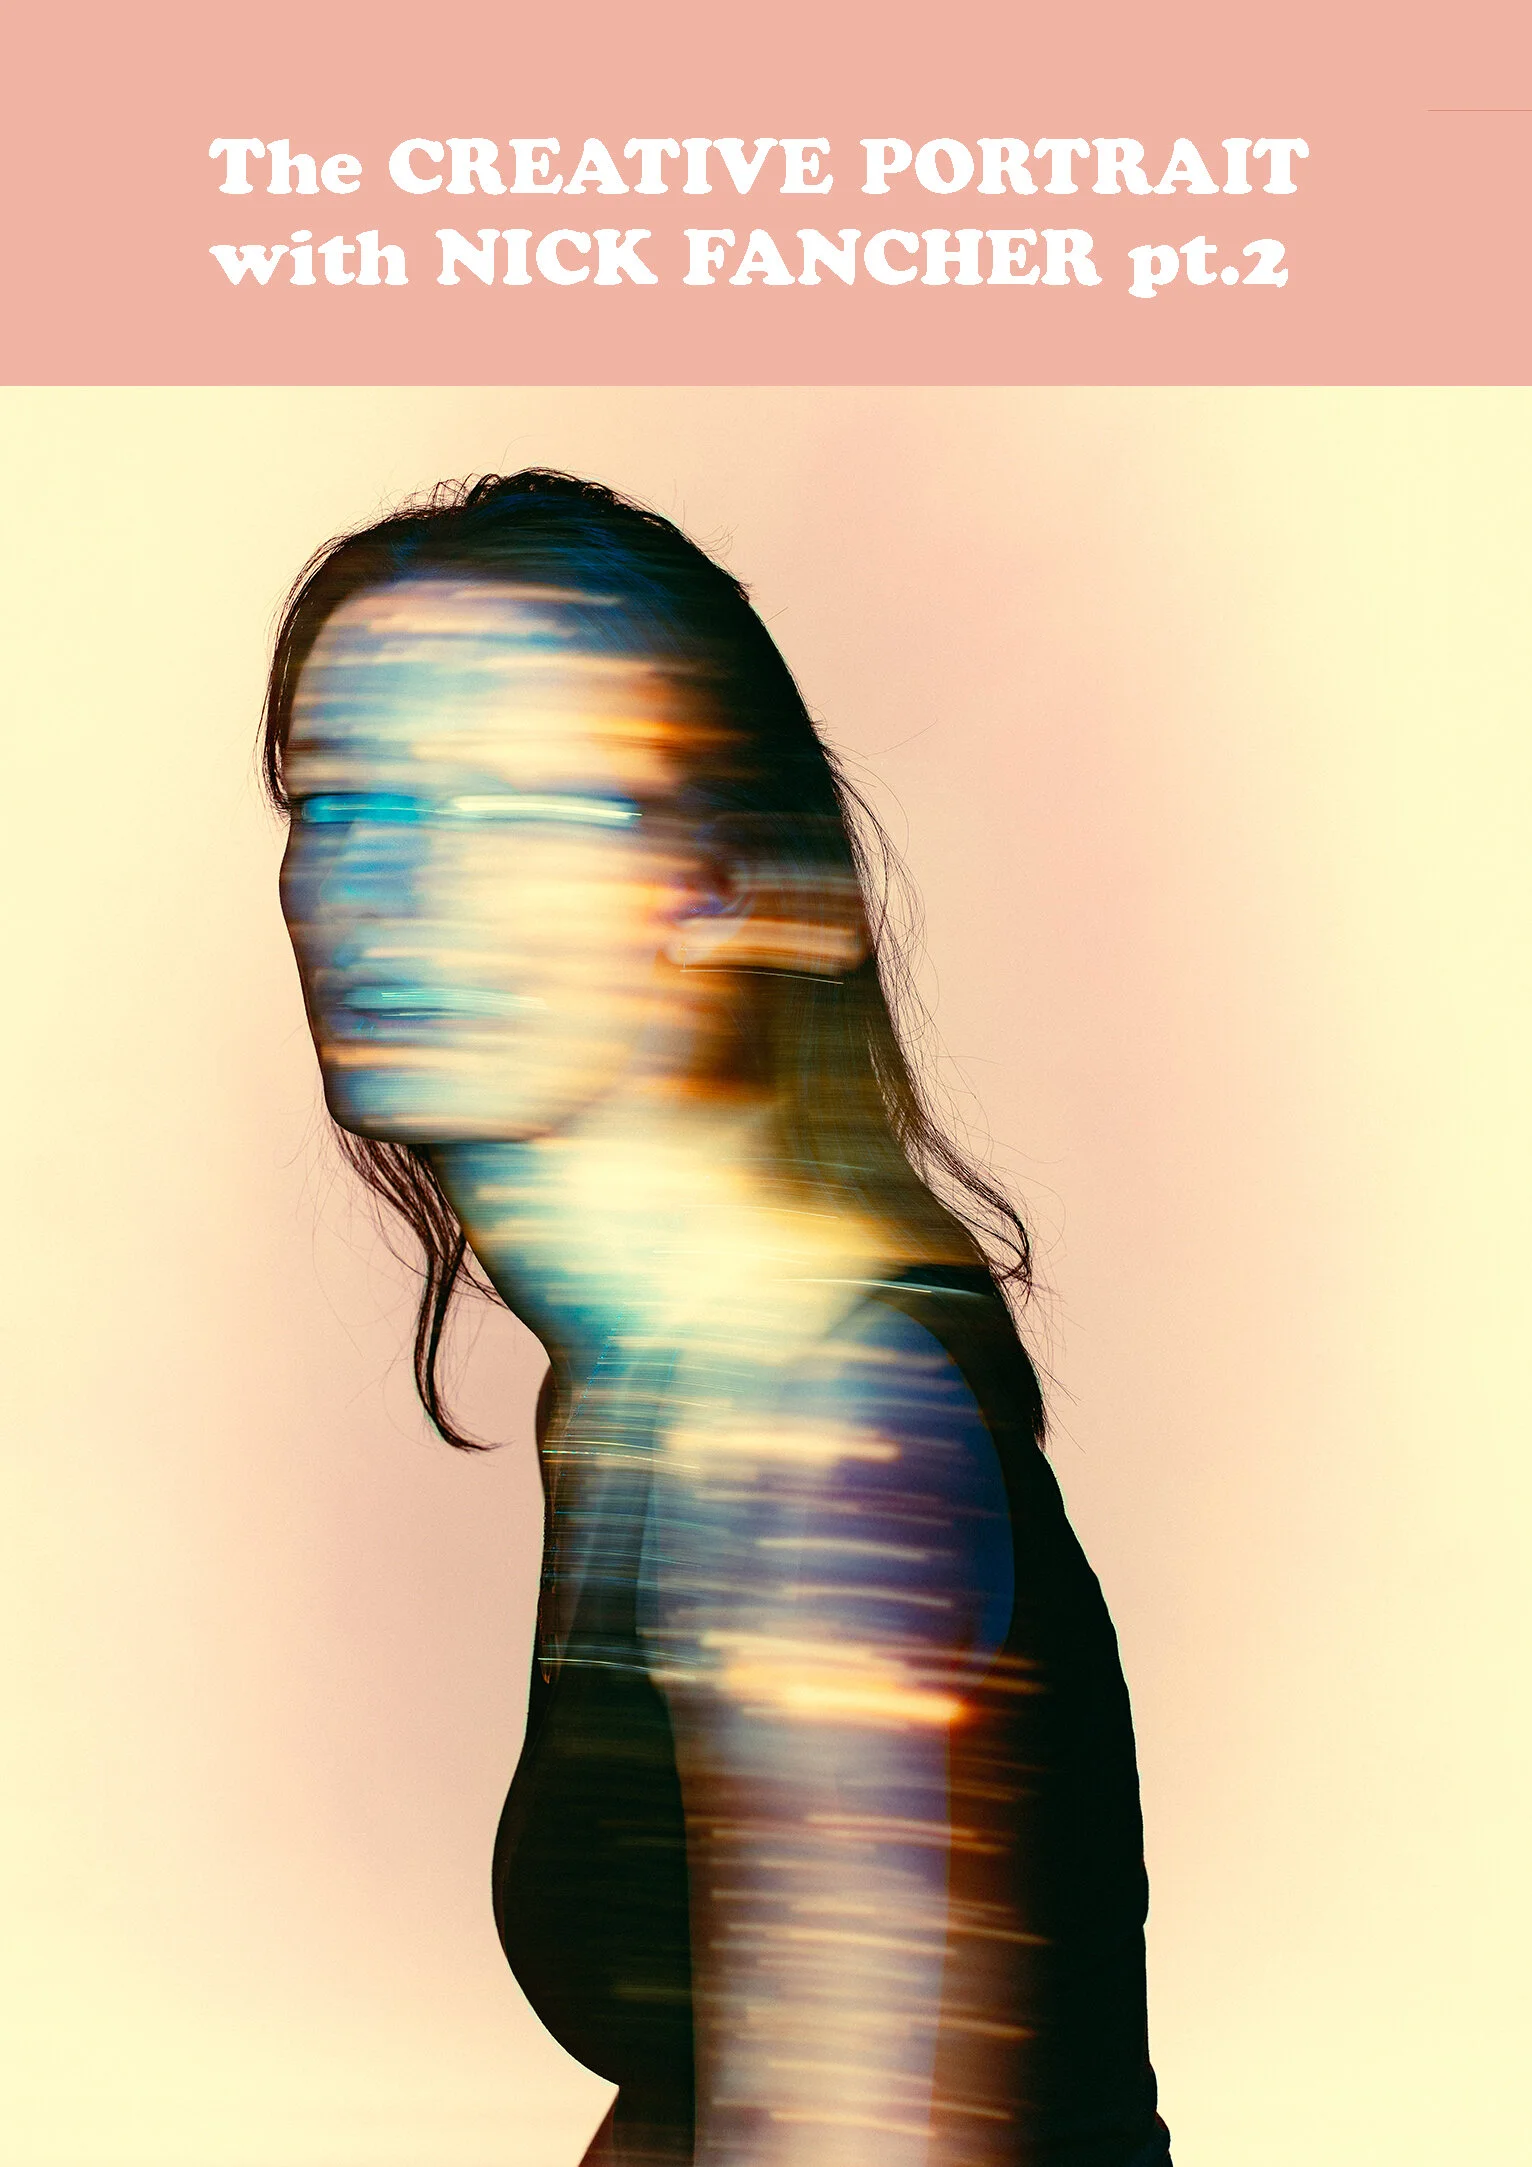
Episode two of The Creative Portrait is now live. In case you missed my previous post, I am teaching my entire creative process in a multi-episode video series. In this episode I cover the following setups:
Using a projector as light source
Customizing images to project onto my subject
Balancing a projected image on my subject with a strobe on the background and a slow shutter speed to create vibrant, kinetic images
Projecting custom images as a background
Balancing a projected image on the background and a strobe on my subject with a slow shutter speed to create kinetic, vibrant images
Customizing the projected image to my subjects features
Using a custom snoot on my subject and projecting images through fog to create a colorful haze
Using a gelled LED on my subject and a strobe on my background with a slow shutter speed to get subtle, painterly results
Shooting the reflection on a cracked mirror to get a prismatic result
Bouncing a light into a cracked mirror to reflect the shape of the cracks onto my subject
Using mylar to create warped reflections of my subject
Adding water drops to mylar to create an added layer of texture
Shooting through an air filter to create textured, painterly images
For more info or to purchase go to https://www.nickfancher.com/video-tutorials-lightroom-tutorials.
All Things to All Men
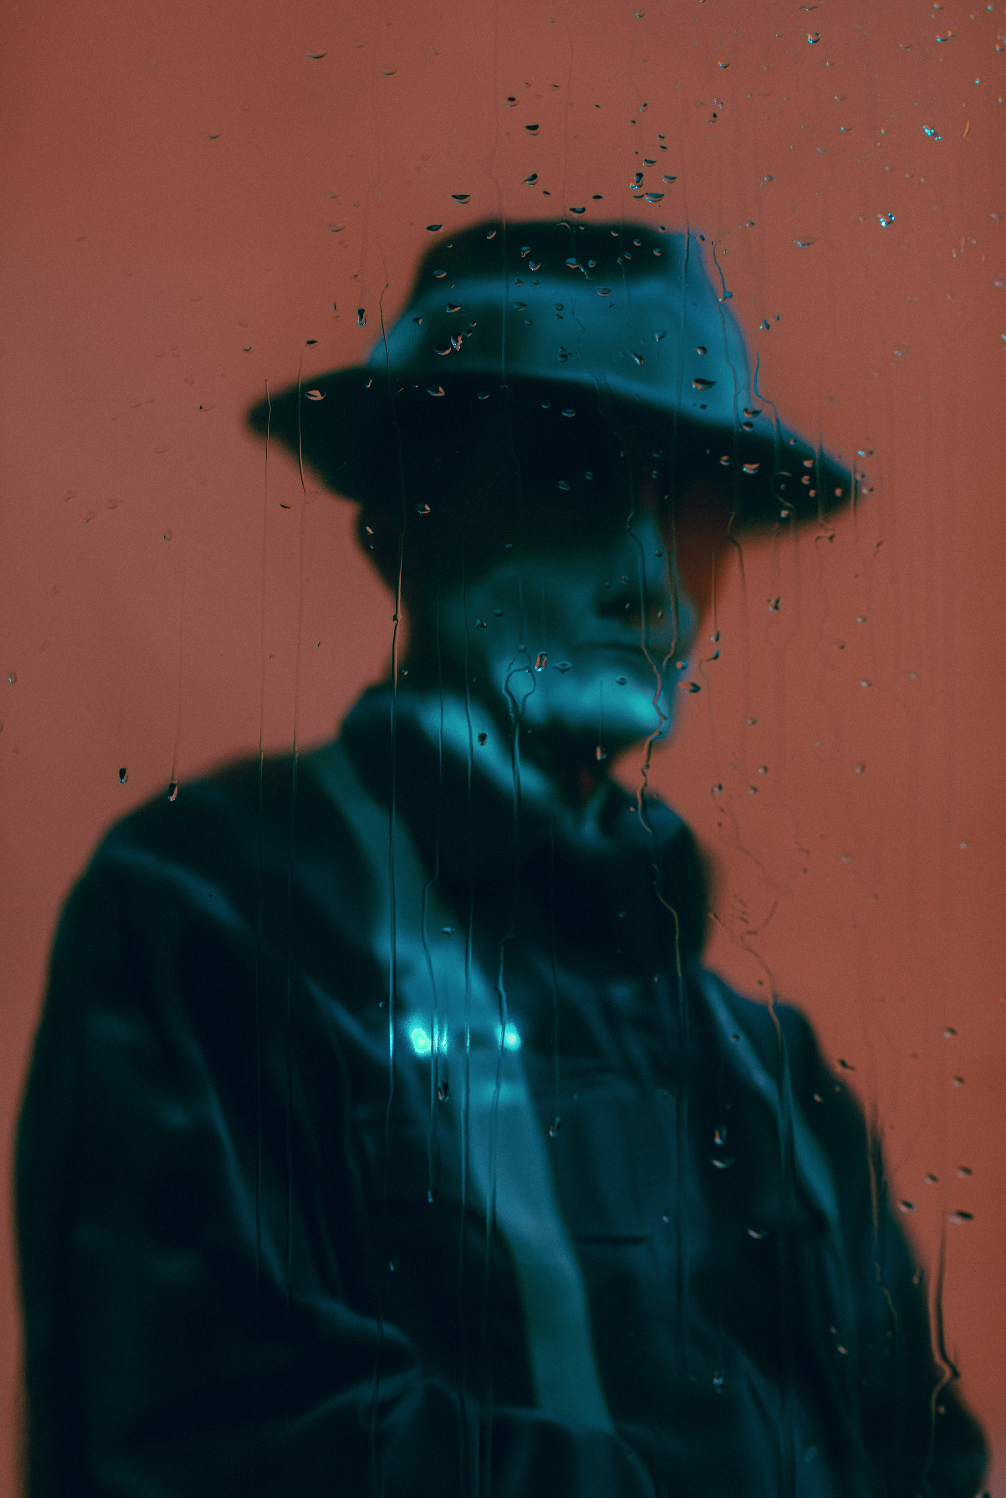
This shoot with Dustin had a bit of something for everyone. I used a projector for most of the scenarios, using it in combination with a range of different camera techniques. I made in-camera multiple exposures, using different blending modes. I explored using slow shutter speeds, both by moving my hands as well as zooming my camera lens. Finally, I fired up a fog machine and projected different images through the smoke. There really are endless ways to use such a simple tool…
This shoot with Dustin had a bit of something for everyone. I used a projector for most of the scenarios, using it in combination with a range of different camera techniques. I made in-camera multiple exposures, using different blending modes. I explored using slow shutter speeds, both by moving my hands as well as zooming my camera lens. Finally, I fired up a fog machine and projected different images through the smoke. There really are endless ways to use such a simple tool.
Many of these scenarios will be included in an upcoming episode of The Creative Portrait, which will be available to purchase in April, here.
New Creative Portrait Video Tutorial
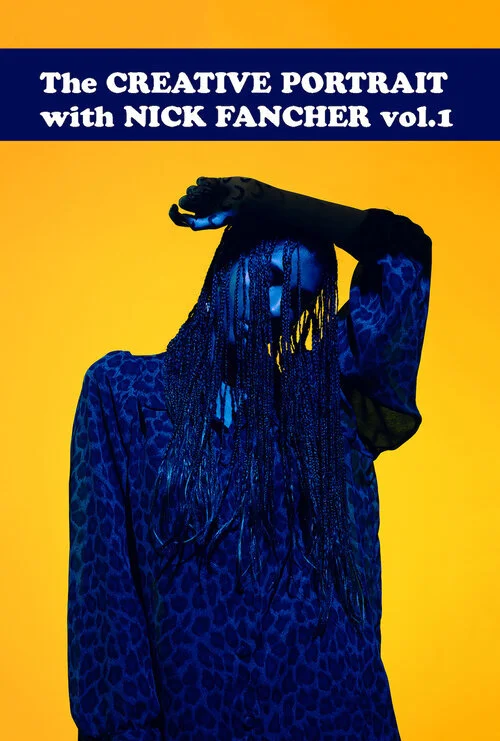
Hey friends. Just a heads up that I have a new, 5-part video series that delves deep into how I execute creative portraits in my studio. My entire creative process is broken down, from A to Z…
Hey friends. Just a heads up that I have a new, 5-part video series that delves deep into how I execute creative portraits in my studio. My entire creative process is broken down, from A to Z. I start off by discussing gear and quickly move into why and when I employ certain techniques based on my concept and subject. Once I begin breaking down a certain technique, my camera and light settings are displayed on the screen along with real-time raw files to make it easy to follow along. I even take you through how I color grade the file in Lightroom. These lessons are not only for those who want to learn new techniques but also for experienced photographers who are looking to push into new creative territories. For more info go to https://www.nickfancher.com/video-tutorials-lightroom-tutorials.
You can also watch an excerpt of the first episode below:
Old Man Gloom
It’s always great when I get a chance to reconnect with Jim. We worked through a range of creative scenarios in this shoot. I shot his reflection with a broken mirror. I shot through a distressed air filter. I played with mylar. It was my first time splattering water onto the mylar, and found that the warped nature of the material in addition to the water added a nice graphic novel-look to the images. These techniques are all part of a new video series I’m currently working on, titled The Creative Portrait. Keep an eye out for the first episode, dropping soon!
It’s always great when I get a chance to reconnect with Jim. We worked through a range of creative scenarios in this shoot. I shot his reflection with a broken mirror. I shot through a distressed air filter. I played with mylar. It was my first time splattering water onto the mylar, and found that the warped nature of the material in addition to the water added a nice graphic novel-look to the images. These techniques are all part of a new video series I’m currently working on, titled The Creative Portrait. The first episode is available here.
It's Always Sunny with Sonny
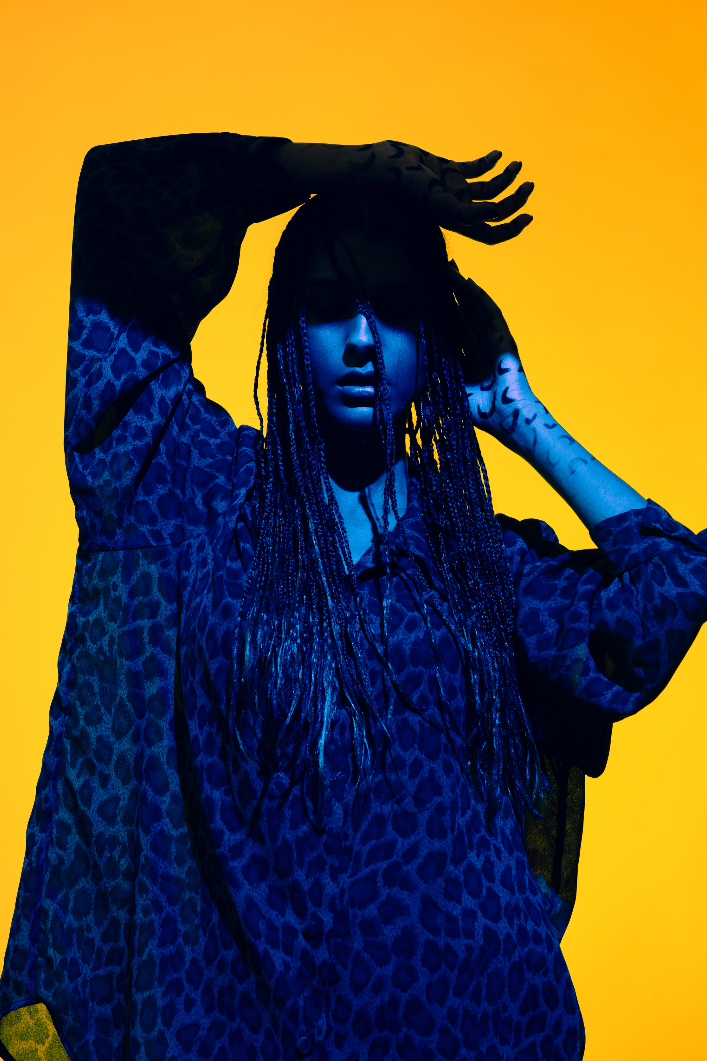
Last week I shot with Sonny and we did all the things. I started with a single, un-gelled “hard” light and then began ratcheting up the complexity. By using a range of different cucoloris (cookies) I created organic-shaped shadows on her face. By adding a cyan-gelled background light I was able to give the feeling of her being outside on a sunny day. We went on to play a range of different shadow-makers and color which worked perfectly with her long braids and flowing outfits.
Last week I shot with Sonny and we did all the things. I started with a single, un-gelled “hard” light and then began ratcheting up the complexity. By using a range of different cucoloris (cookies) I created organic-shaped shadows on her face. By adding a cyan-gelled background light I was able to give the feeling of her being outside on a sunny day. We went on to play a range of different shadow-makers and color which worked perfectly with her long braids and flowing outfits. These techniques are all part of a new video series titled The Creative Portrait, available here.
RJD2: The Fun Ones Photo Shoot
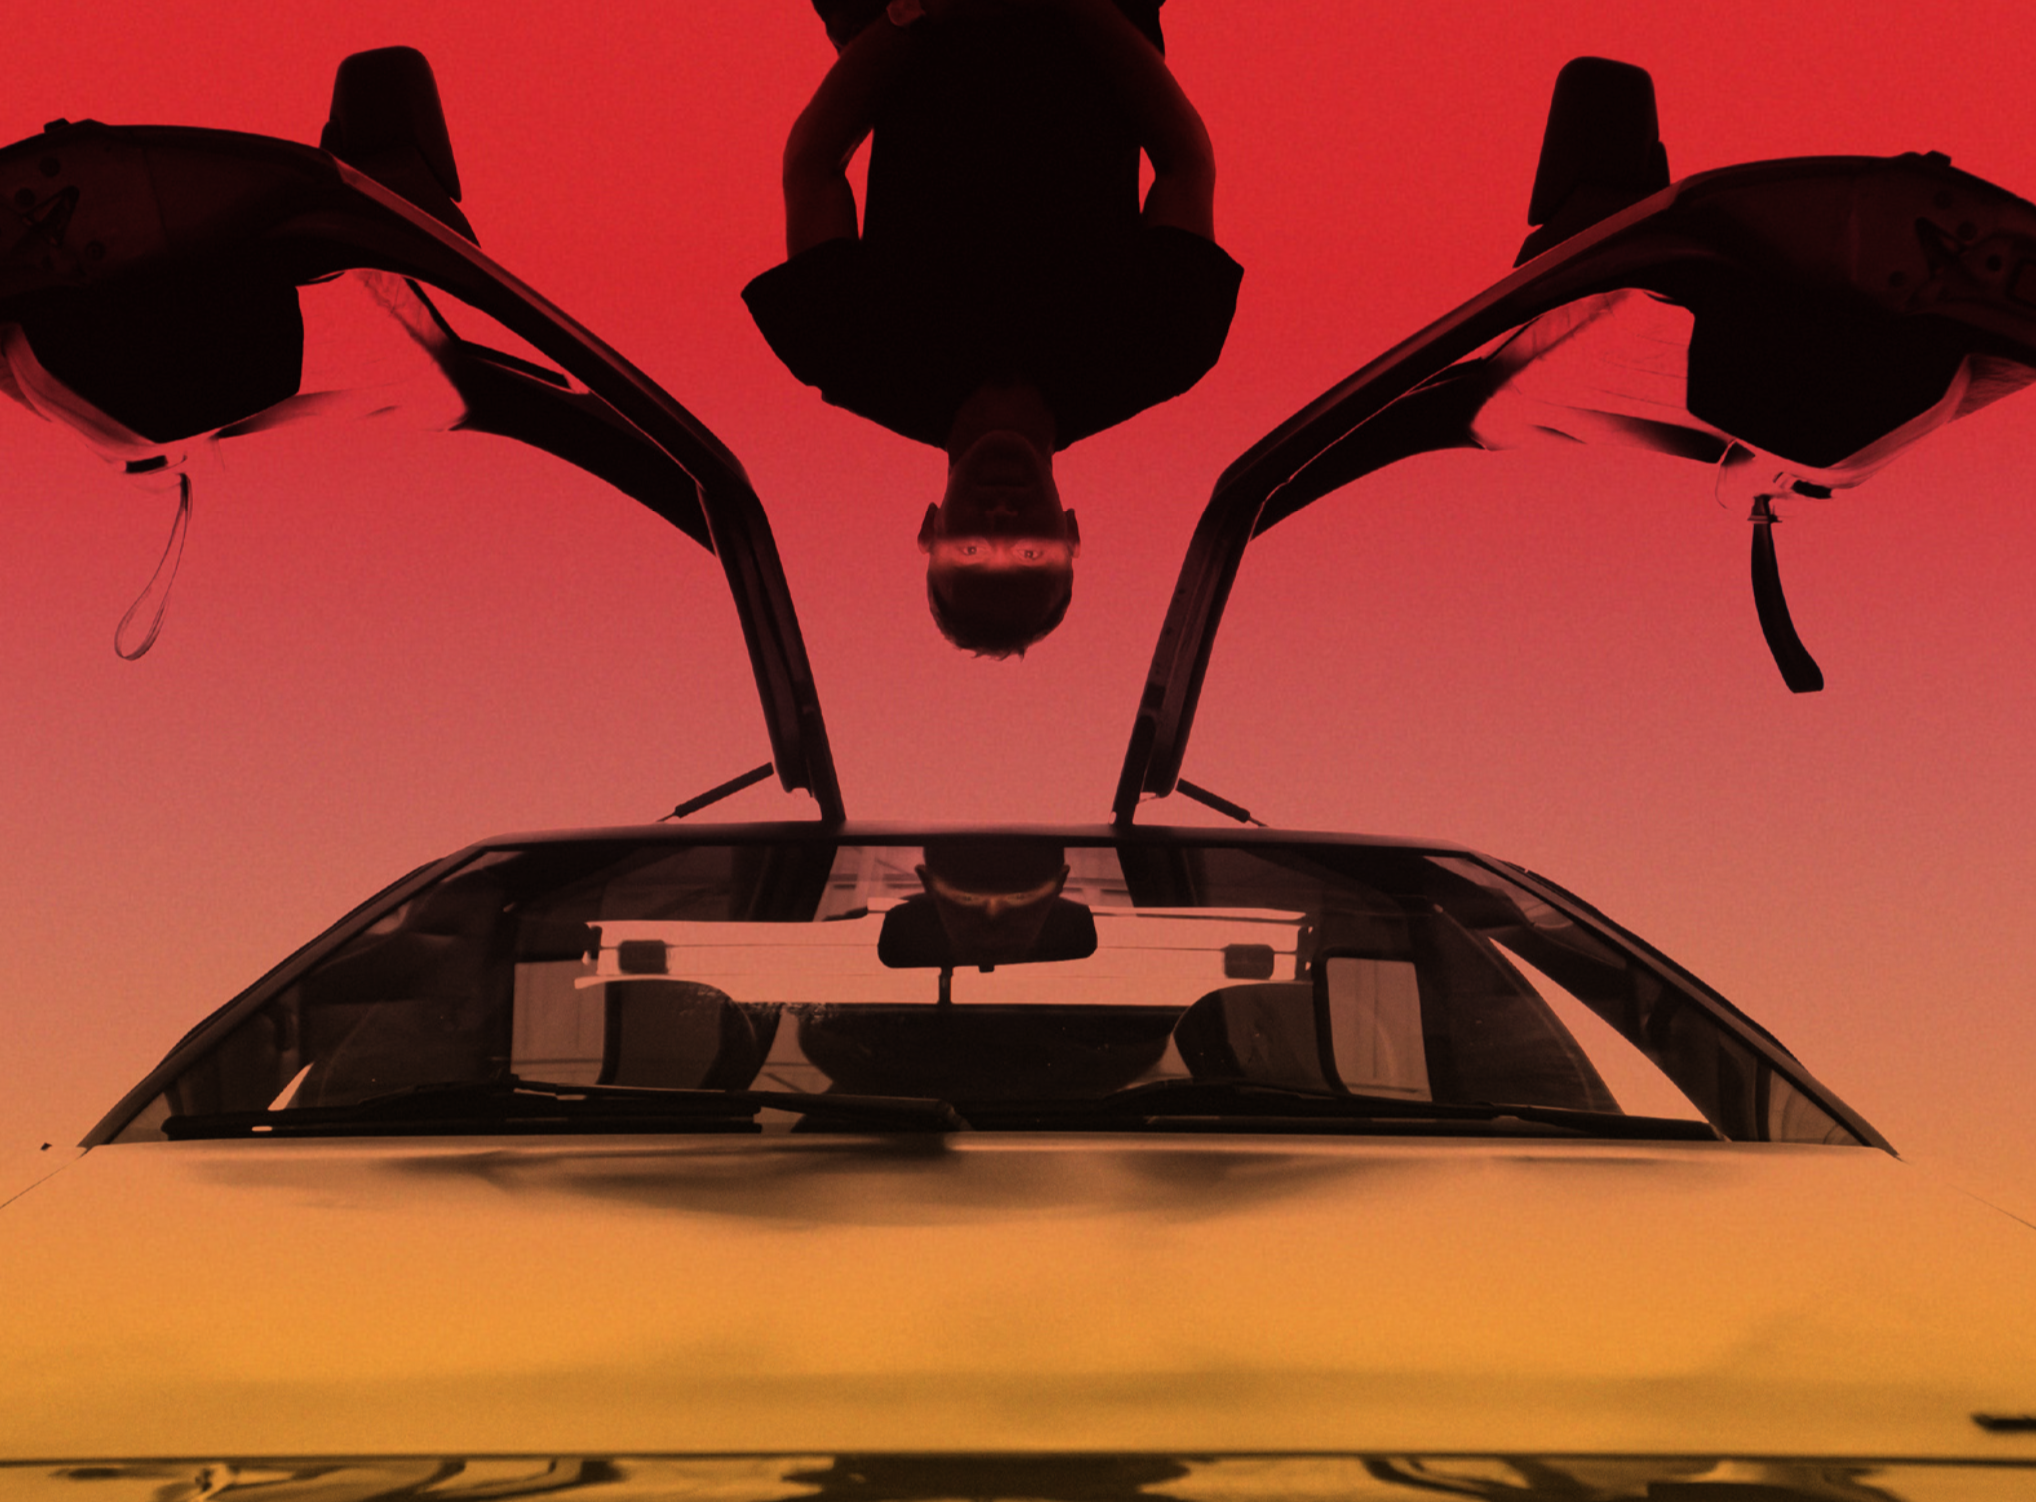
In late 2018 my buddy RJ (aka RJD2) approached me about shooting the cover art for an upcoming album he was working on. He didn’t have a concrete idea about what he wanted to do but suggested possibly involving his Delorean. He was specific about the images not being about the car itself but rather capturing elements of the cars shape and incorporating them into creative portraits. I was intrigued but really couldn’t visualize what the hell he was talking about. Eight months later he hit me up and told me he was ready to shoot. He said that he had a garage that he’d just painted white that had a 14-foot ceiling with trusses. His plan was to suspend himself upside down above the open doors of his Delorean, and seemed confident that he could rig himself adequately with a climbing harness and some ropes. When I suggested that it may be easier to just shoot him and the car separately and composite them he was aghast. Ok, we’ll do it the hard way.
I met my assistant Seth at RJ’s garage on a particularly hot day in August. The windowless space was hovering right around 100 degrees. It was also filled with a bunch of clutter, including a broken two-ton scissor lift. The space was small enough that there was no way I could get the depth I needed to make the shot work with the lift in the space, so it would need to be moved. With three of us pushing on it the lift wouldn’t even wiggle. Thinking on his feet, RJ grabbed an industrial-sized car jack and jacked up one side of the lift, sliding a cart underneath. Then he jacked up the other side and did the same. With the lift on castors the three of us were able to get it out of the space. Now to figure out the rope situation.
RJ began rigging up a couple of ropes, trying to gauge the right distance and height so that he could hang upside down with his head centered a foot above the car roof. Once he got the ropes right he would climb up and flip upside down only to find that the car needed to move an inch to the left. Then he’d climb down, we’d roll the car forward six feet, adjust the steering wheel, and roll it back into place, hopefully in exactly the right spot. It took three or four attempts.
Once the car position and rope rig was sorted out we were ready to shoot, although RJ was now red, sweaty, and disheveled (we all were). As RJ got himself correct I started placing lights and dialing in my settings. My plan was to shoot the setup a couple different ways. The first version was against a white background and the second against a dark background. Even with the space emptied I didn’t have much depth to place lights. Ideally I would’ve had twenty feet behind the car to blow out the background to keep light from spilling onto RJ, but there just wasn’t enough room. I also would’ve preferred to use a longer focal length lens to compress the car and RJ, but the space dictated that I use my 16-35mm lens.
RJ got into position over the car, sitting upright until my lighting was ready. I used two Godox AD200s to blow out the background, which I placed on the trunk, aiming into the back wall (small flashes FTW). Next I hooked up a projector to my laptop and created a white line in Photoshop, which I then cast across RJs eyes (in order to get a good exposure on the projector I had to cut the room lights). Once the lighting was set, RJ inverted himself and I snapped about ten frames and then had him flip back up and rest. Any longer and his face would’ve been too red. I quickly reviewed my images, had him flip upside down once more, snapped ten more frames and got the shot (see top image). With the bright shot out of the way, I repositioned once of background lights to aim back toward the camera, leaving RJ silhouetted. Such a simple change of the lights angle completely transformed the shot into a dramatic teaser image, which ended up making the cover of the album. Had we instead decided to composited the image, one thing I wouldn’t have thought to photoshop was his inverted reflection that you can see at the top of the windshield. It always pays to get the shot in-camera.
With the main shots out of the way, RJ climbed down and I set up to take a simple portrait of him. My plan was to get one good portrait of him with a lot of dark shadows and bright whites against a white background. This type of shot is ideal for making multiple exposures, which my Canon 5DIV can easily do in camera. I set the portrait I had just taken as my base image. I turned on the multiple exposure feature and set the overlay mode to “bright”. I turned on the cameras live view, which displayed the portrait of RJ overlaid over the viewfinder. Then I moved around the car, selectively shooting graphic elements, each merging seamlessly into the shadow areas of the portrait. RJ ended up using these images as album single covers.
Not counting the time it took to clear the space, the whole shoot was over in just over an hour. Thank you to RJ for including me in your insanity. Thank you Seth for helping make it happen. Thank you readers for staying with me to the end of this recount.
XOXO
Nick
Latest Posts
- January 2019 1
- February 2019 5
- March 2019 5
- April 2019 4
- May 2019 8
- June 2019 8
- July 2019 8
- August 2019 6
- September 2019 8
- October 2019 7
- November 2019 6
- December 2019 8
- January 2020 5
- February 2020 6
- March 2020 7
- April 2020 8
- May 2020 5
- June 2020 4
- July 2020 5
- August 2020 7
- September 2020 8
- October 2020 8
- November 2020 6
- December 2020 6
- January 2021 6
- February 2021 7
- March 2021 6
- April 2021 5
- May 2021 6
- June 2021 6
- July 2021 6
- August 2021 3
- September 2021 5
- October 2021 4
- December 2021 3
- January 2022 2
- March 2022 2
- April 2022 3
- May 2022 4
- June 2022 1
- July 2022 2
- August 2022 4
- September 2022 6
- October 2022 1
- January 2023 2
- February 2023 1
- March 2023 4
- April 2023 1
- June 2023 2
- July 2023 1
- August 2023 2
- September 2023 4
- October 2023 5
- November 2023 3
- December 2023 1
- January 2024 3
- February 2024 2
- March 2024 8
- April 2024 5
- May 2024 2
- June 2024 2
- July 2024 2
- November 2024 2
- December 2024 1
- February 2025 1
- April 2025 1
- June 2025 1
- July 2025 1